Omnibotika Help Center
Chat Console
This menu displays incoming customer chats from integrated channels, which can be accessed from the Chat Console menu. Customer chats from various channels will be gathered on this one page.
Search User
You can perform a search for the user you want to handle by filling in the search box.

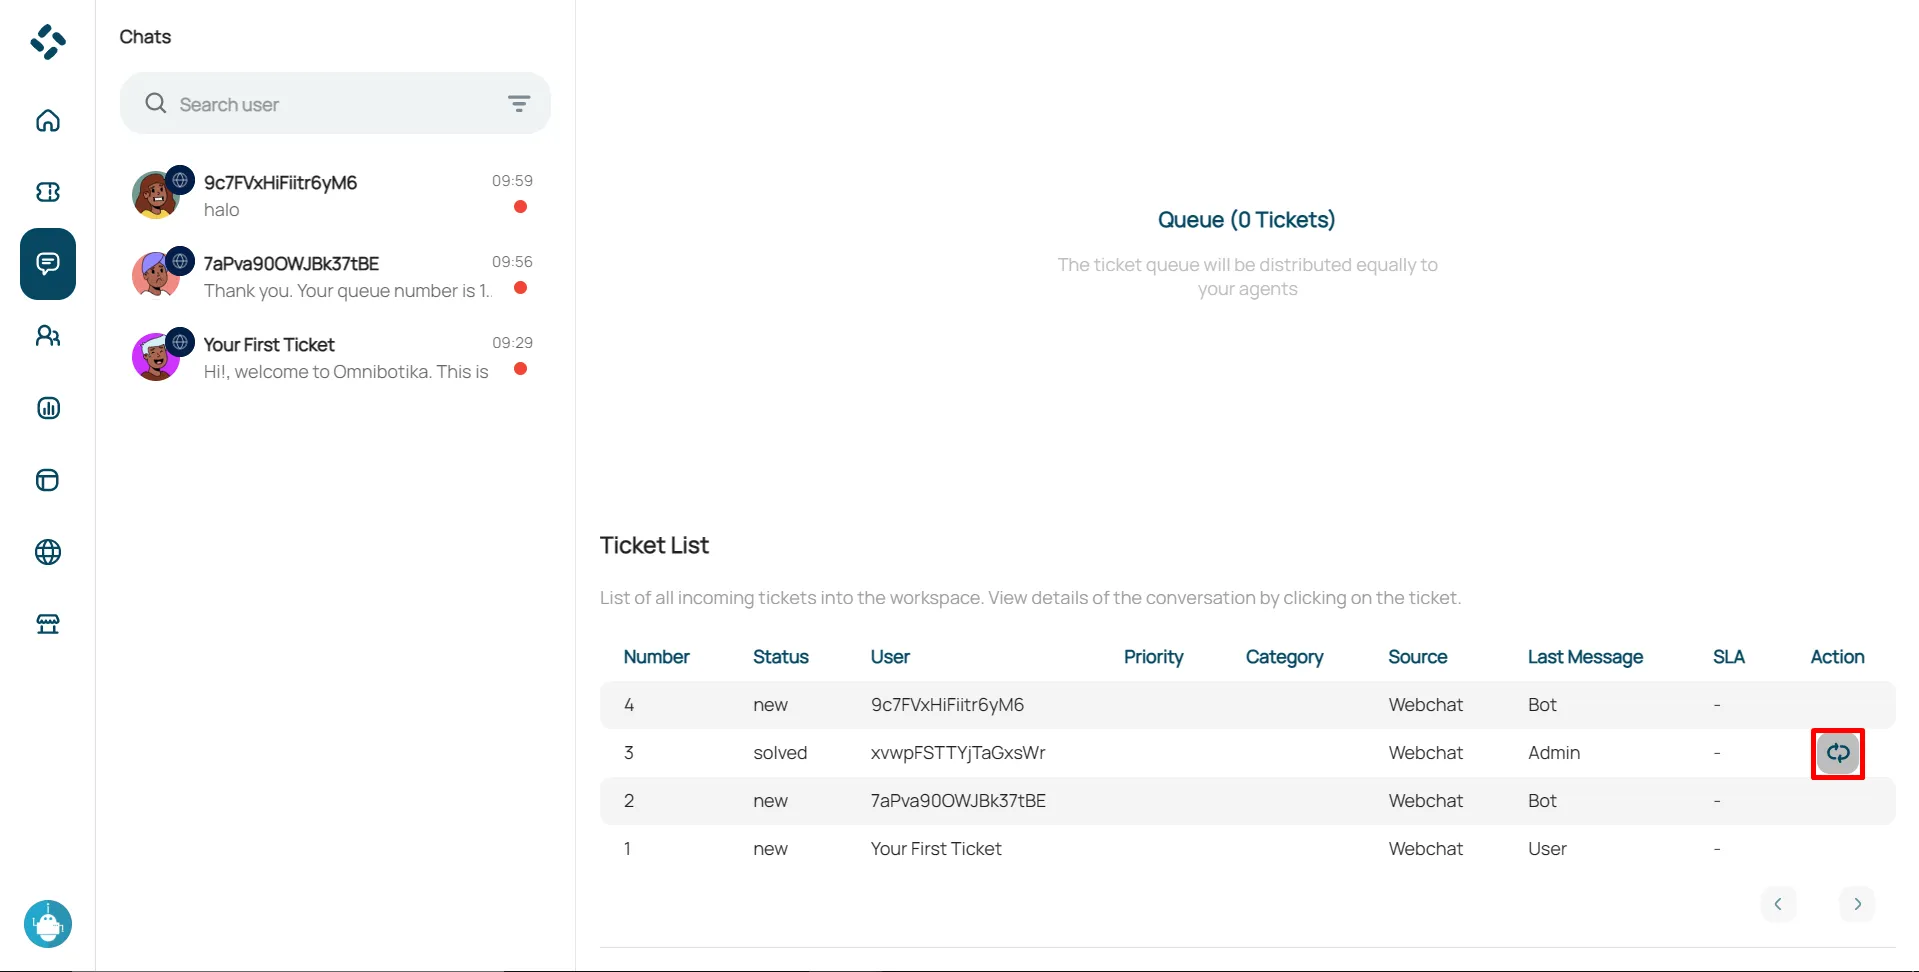
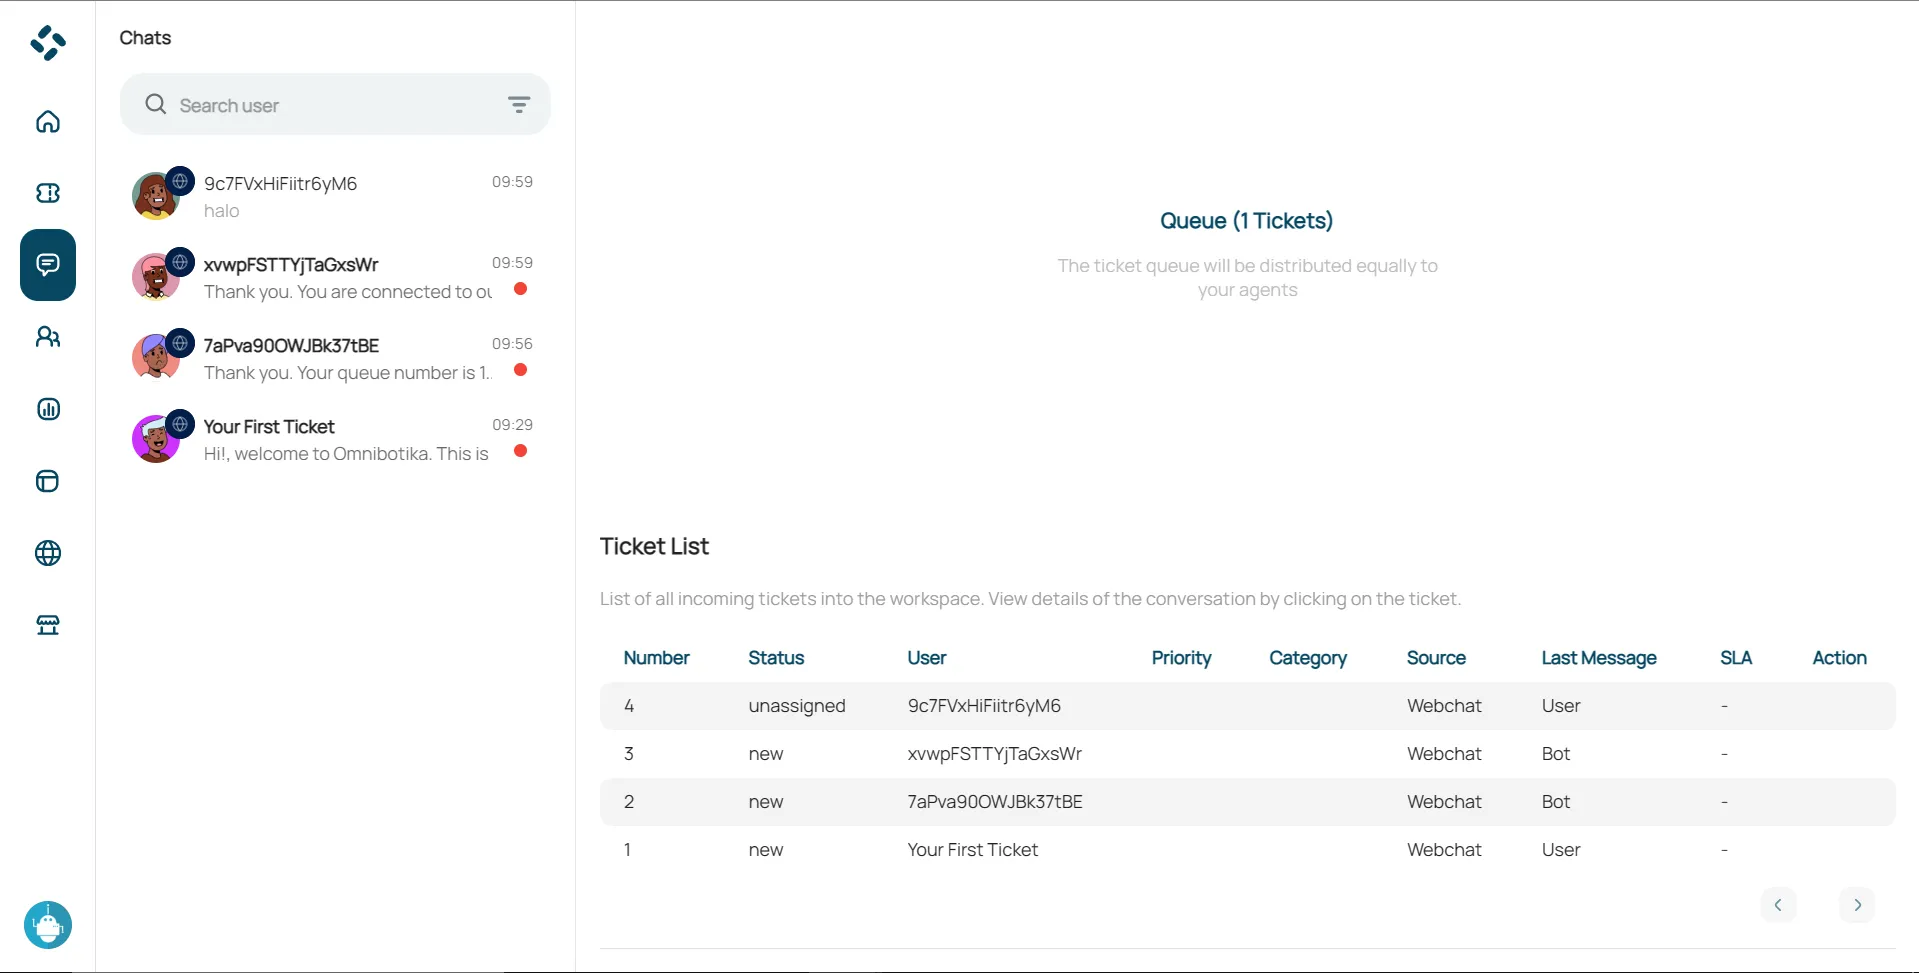
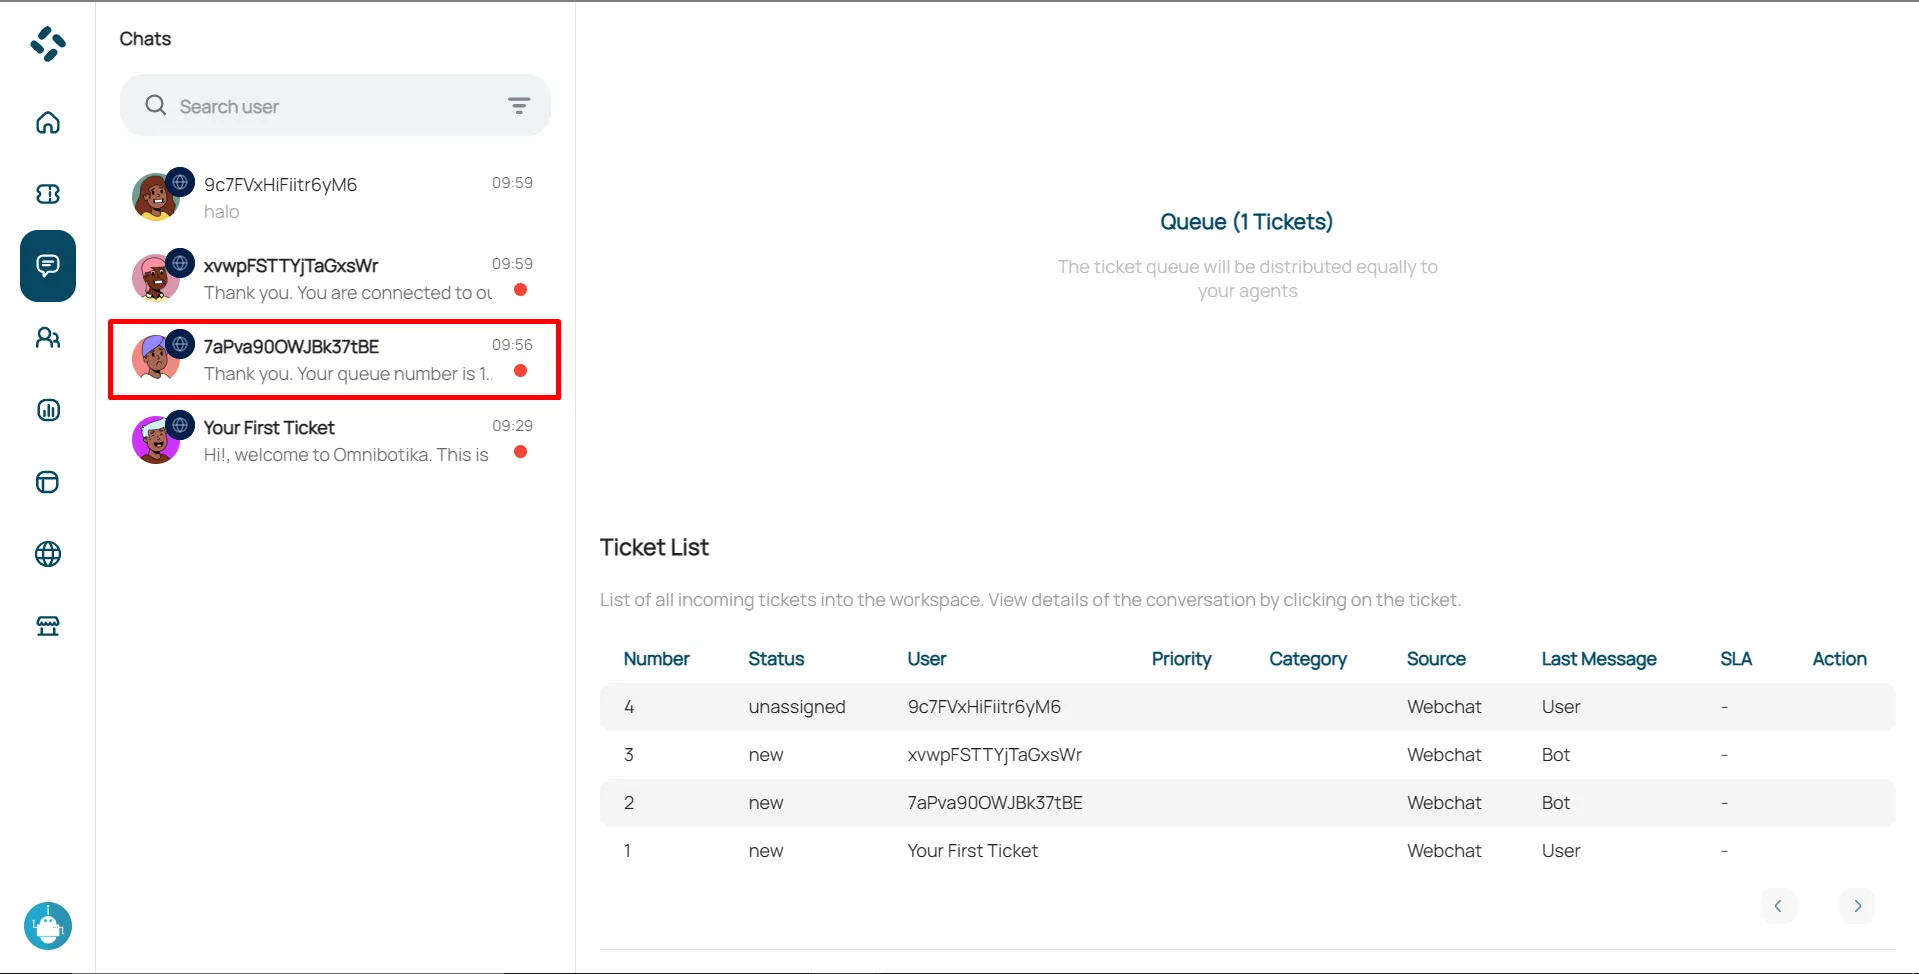
Assign to Me & Queueing Ticket
Queueing ticket contains tickets that are currently in the queue. The assign to me button is to retrieve a ticket from the queue tickets.
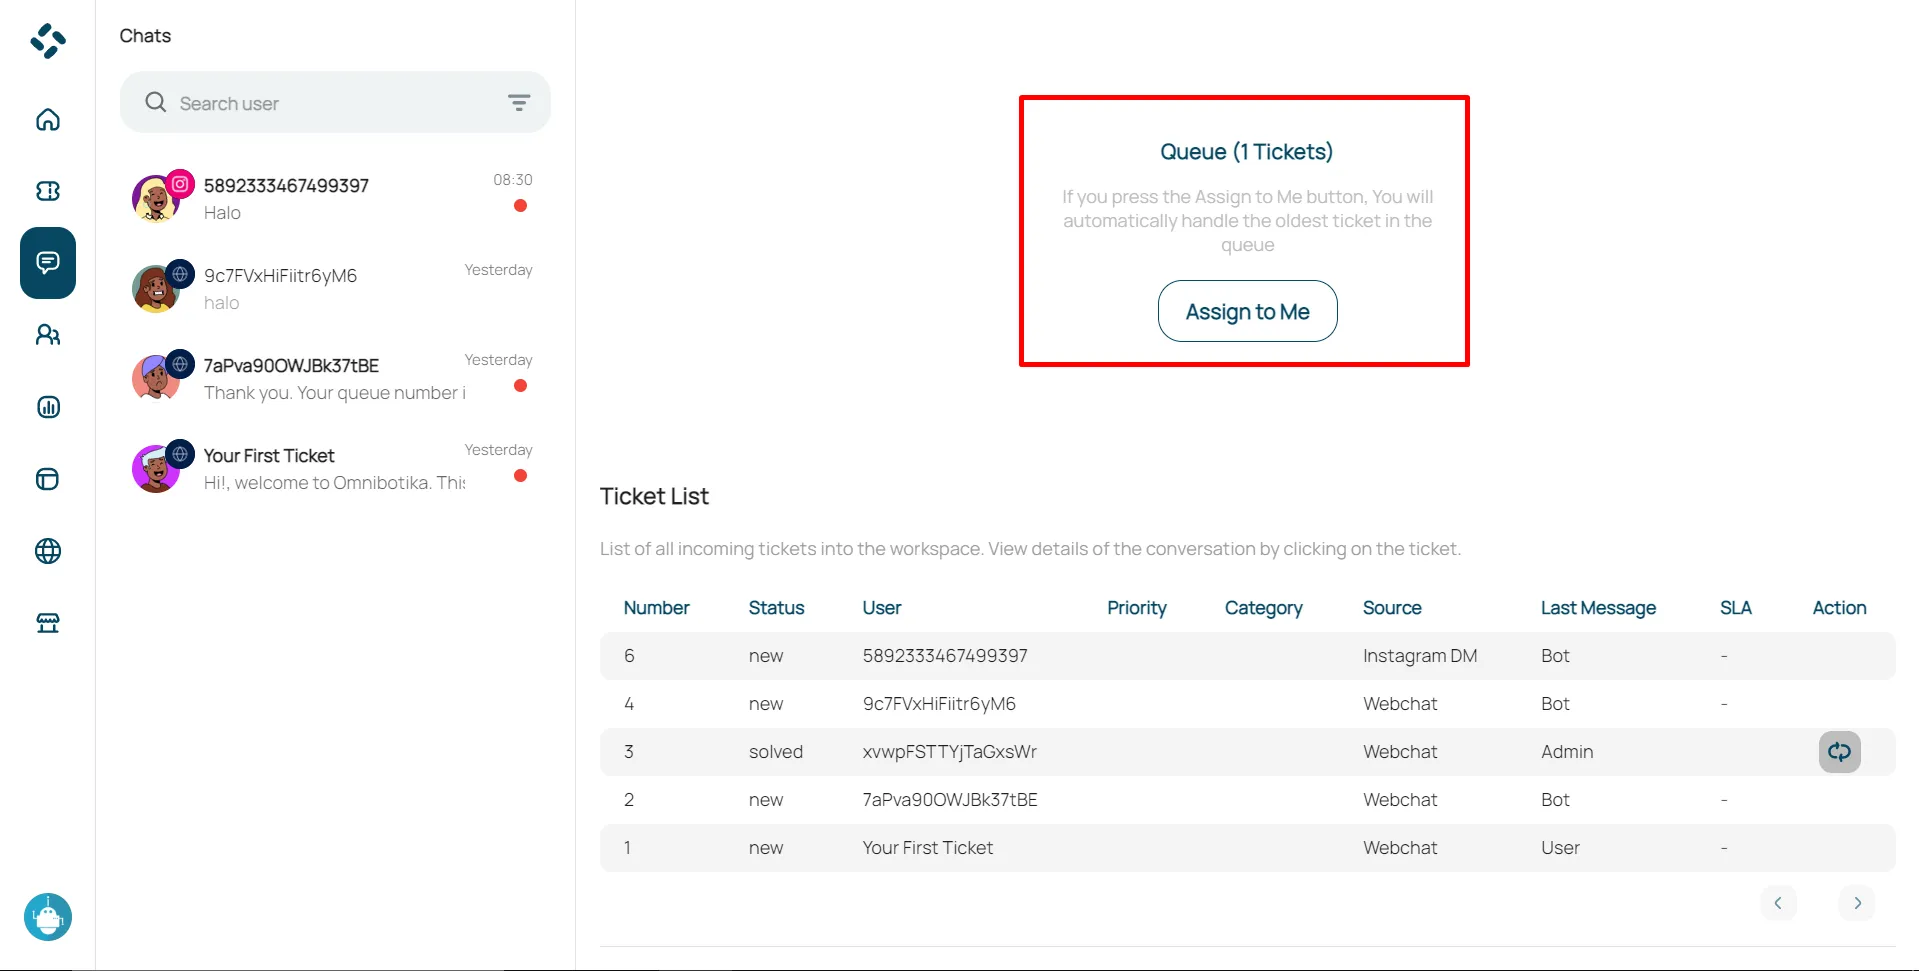
Ticket List
Contains information on ticket number, user, priority, category, last message, SLA, and actions from tickets that have been completed or are being handled by agents.
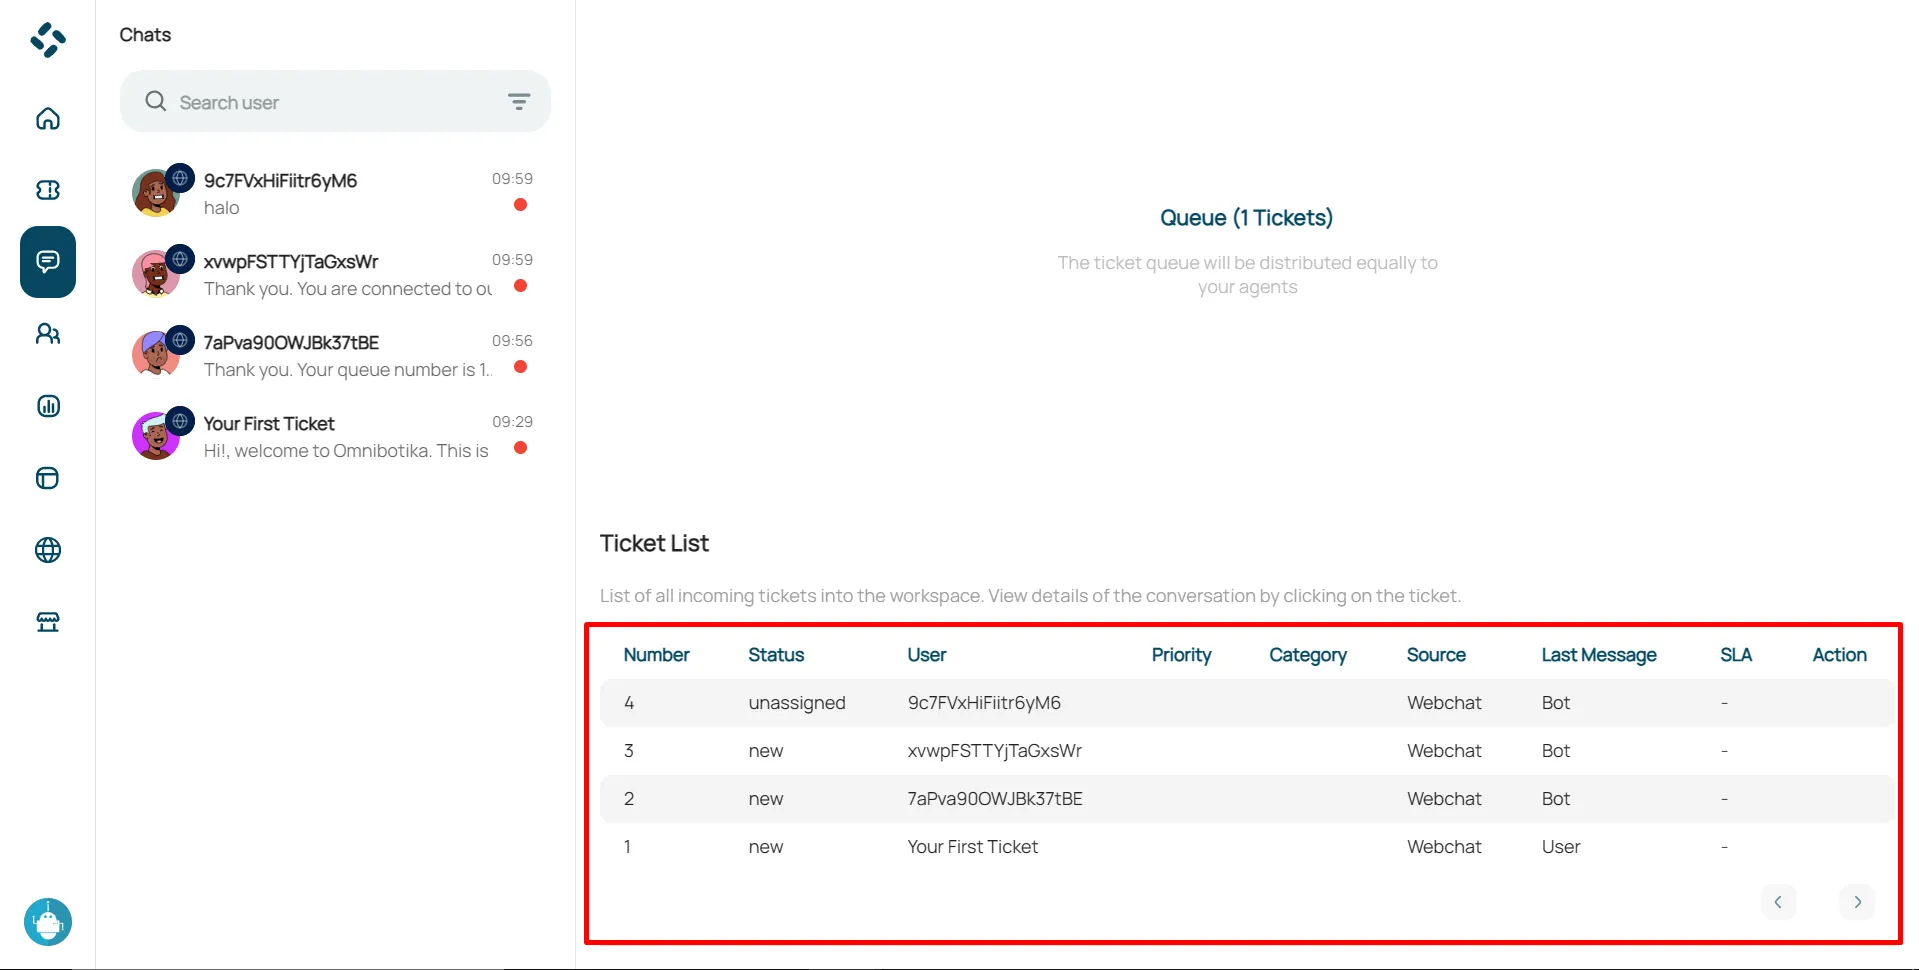
For tickets that have been solved or are being handled, we can see the conversation by clicking on the ticket column according to the ticket that you wanted.
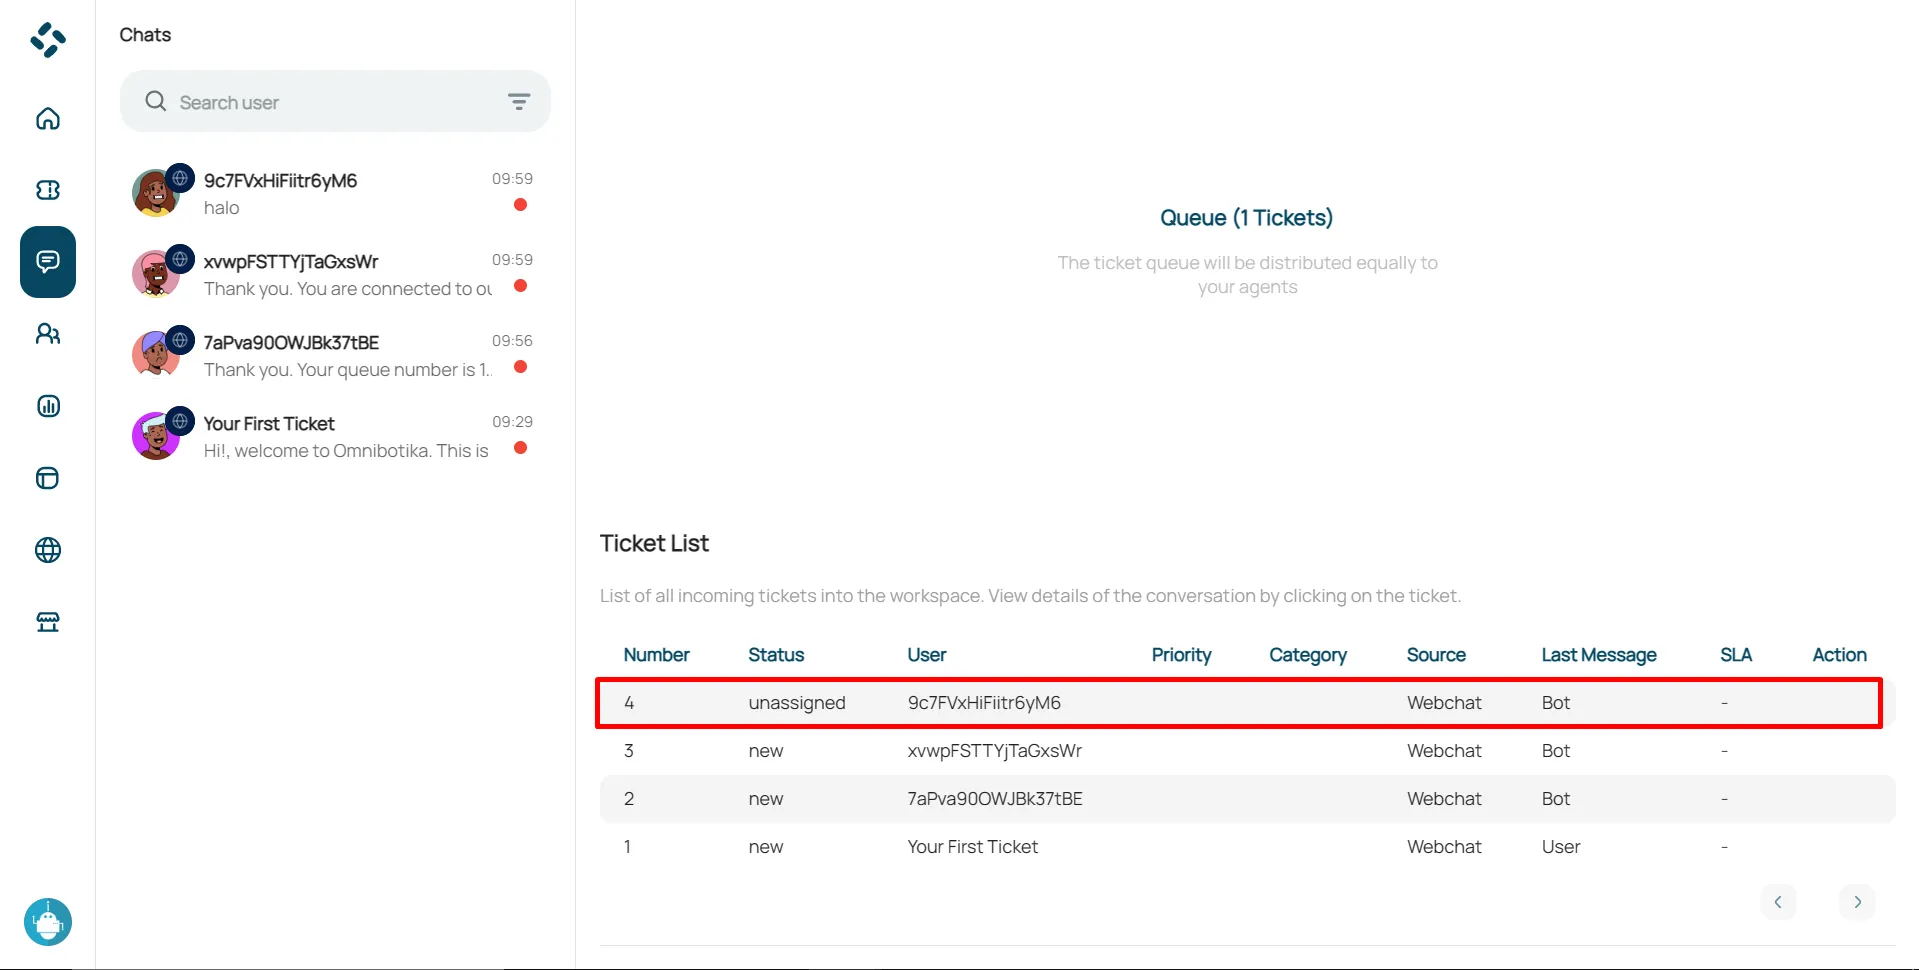
For example : from the picture above, to see your previous conversation, you can click ticket number 6.
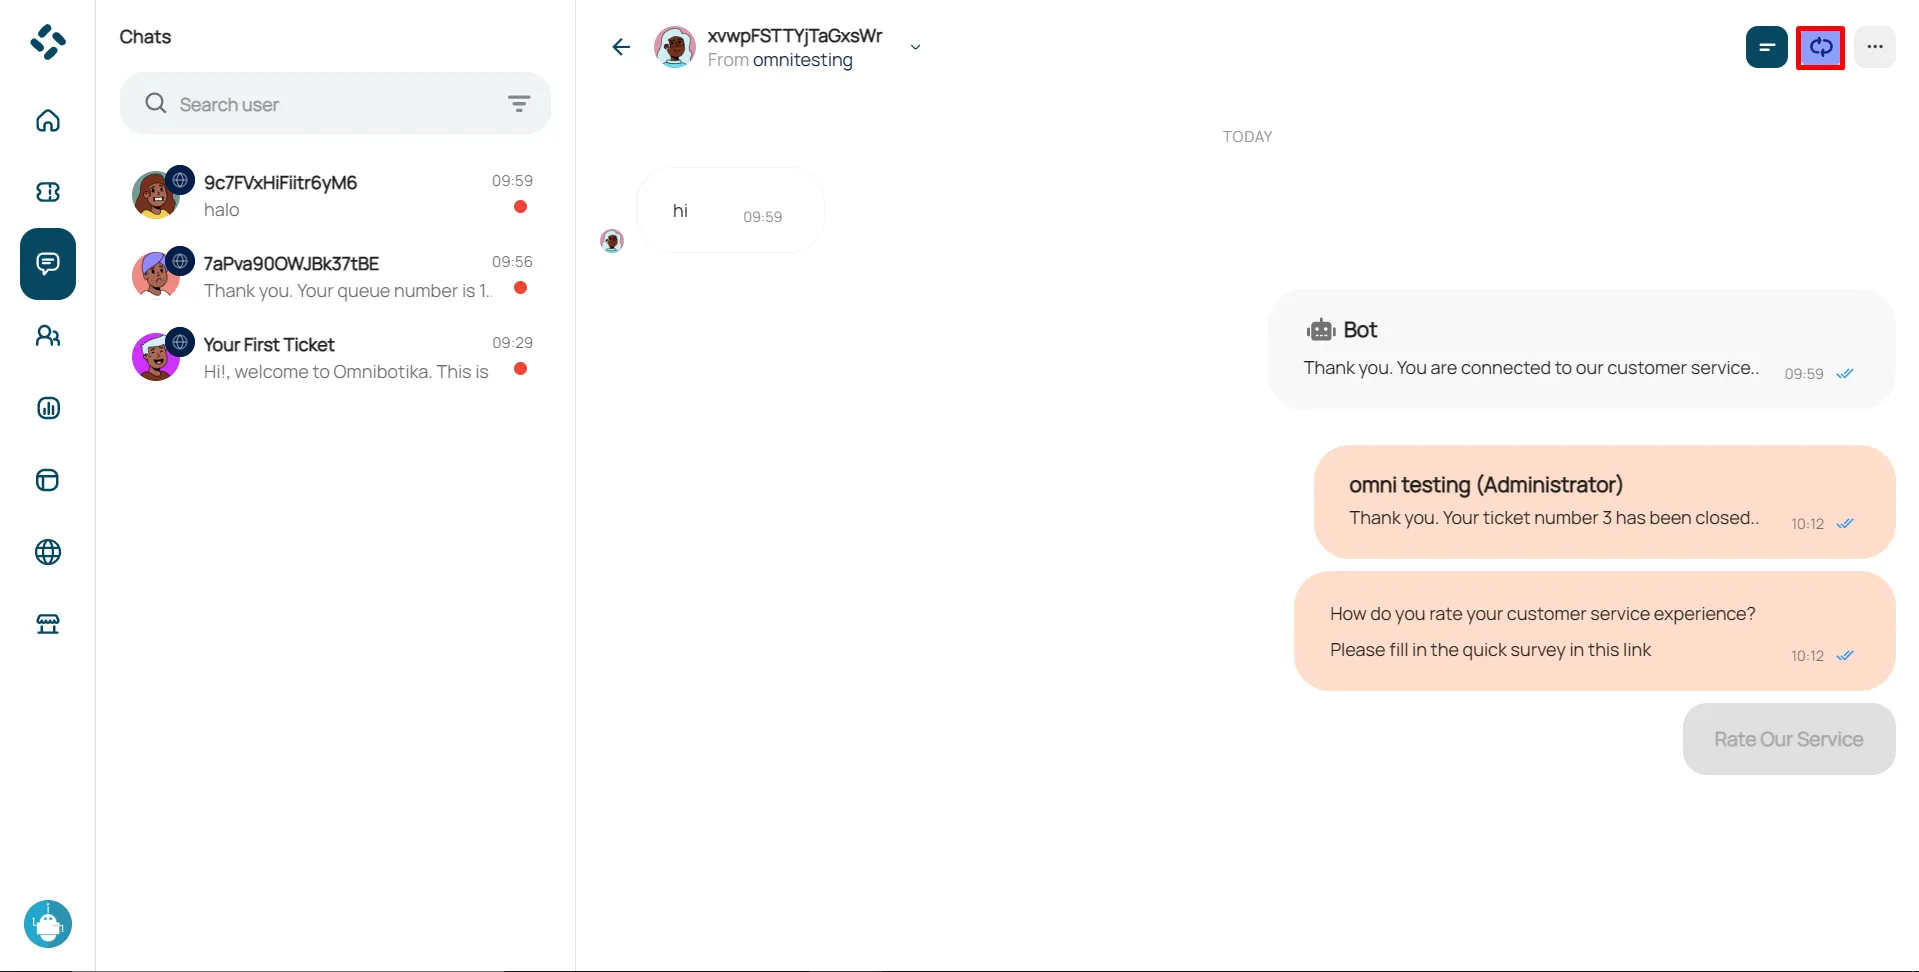
In Table List Ticket, the solved ticket in the action section will have a reopen button, which we can use to reopen the solved ticket.
You can also find this reopen button when viewing the conversation in chat console navigation from the solved ticket. Just click the reopen button in the chat console navigation to reopen the ticket.
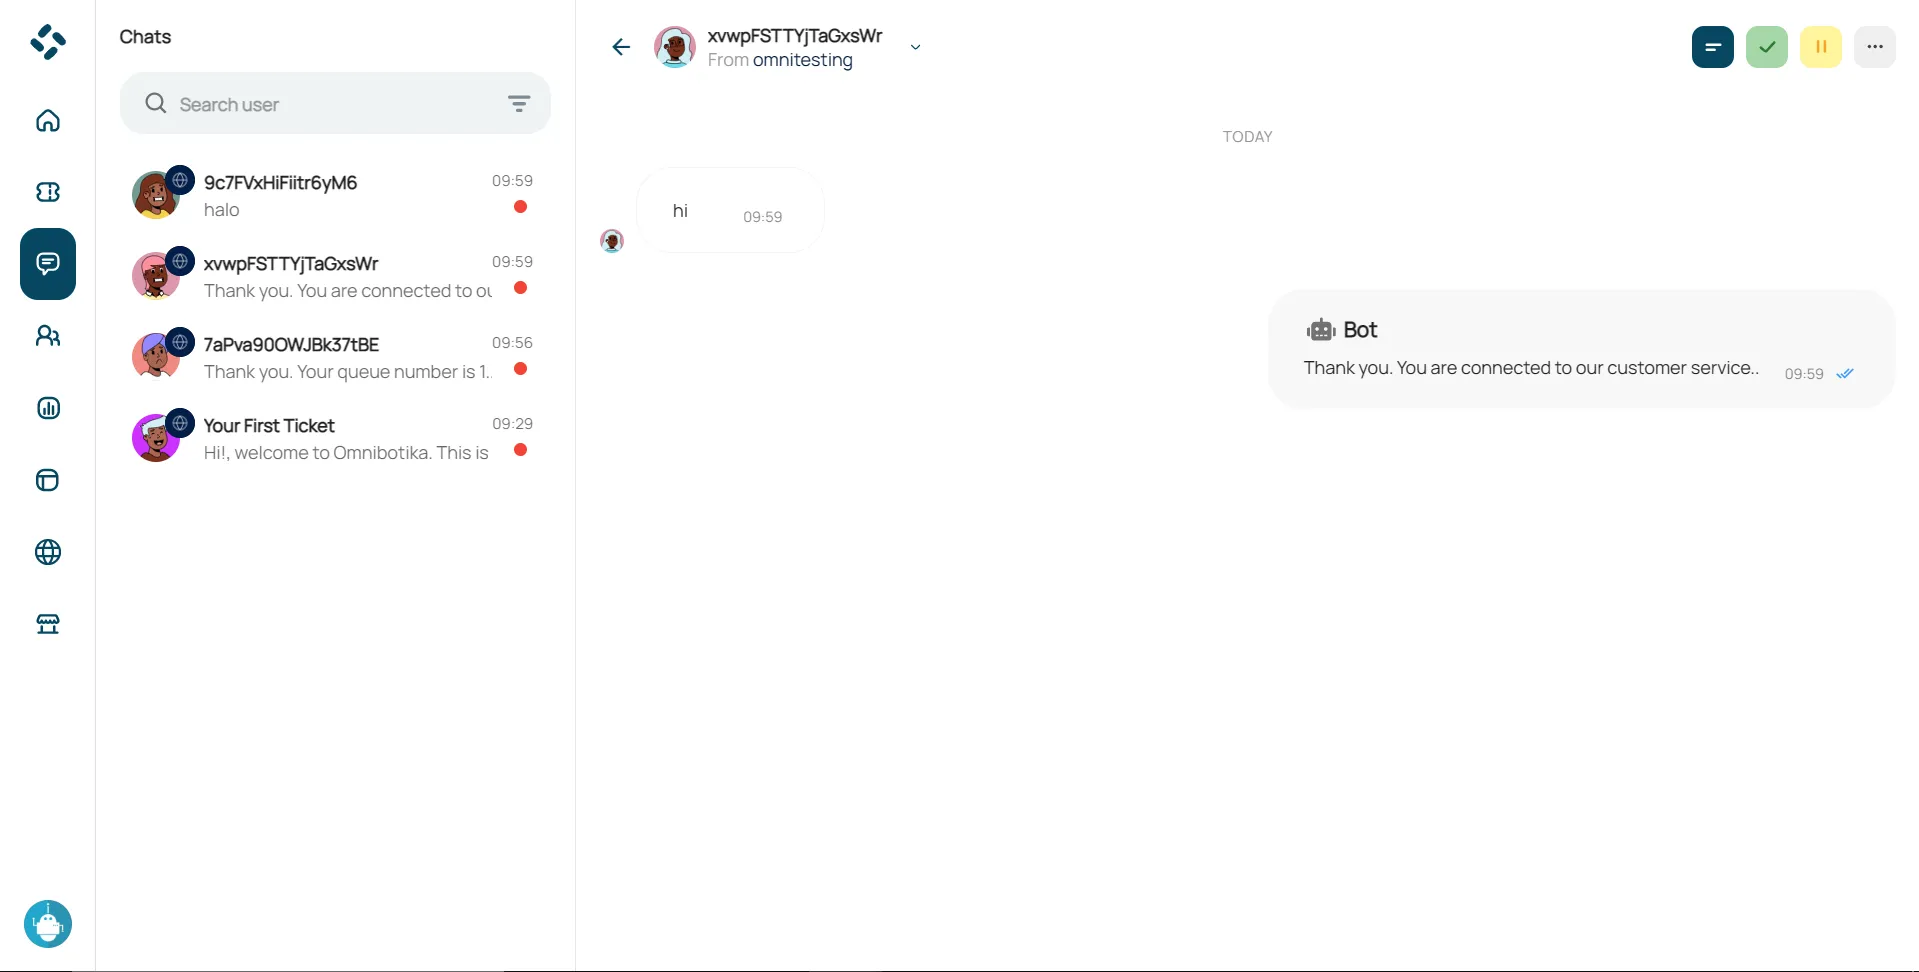
Handle Chat Customer
Follow these steps to reply to a chat:
Select a message you want to reply to.
Type the answer you want to send in the chatbox.
Then press "Enter" to send the message.
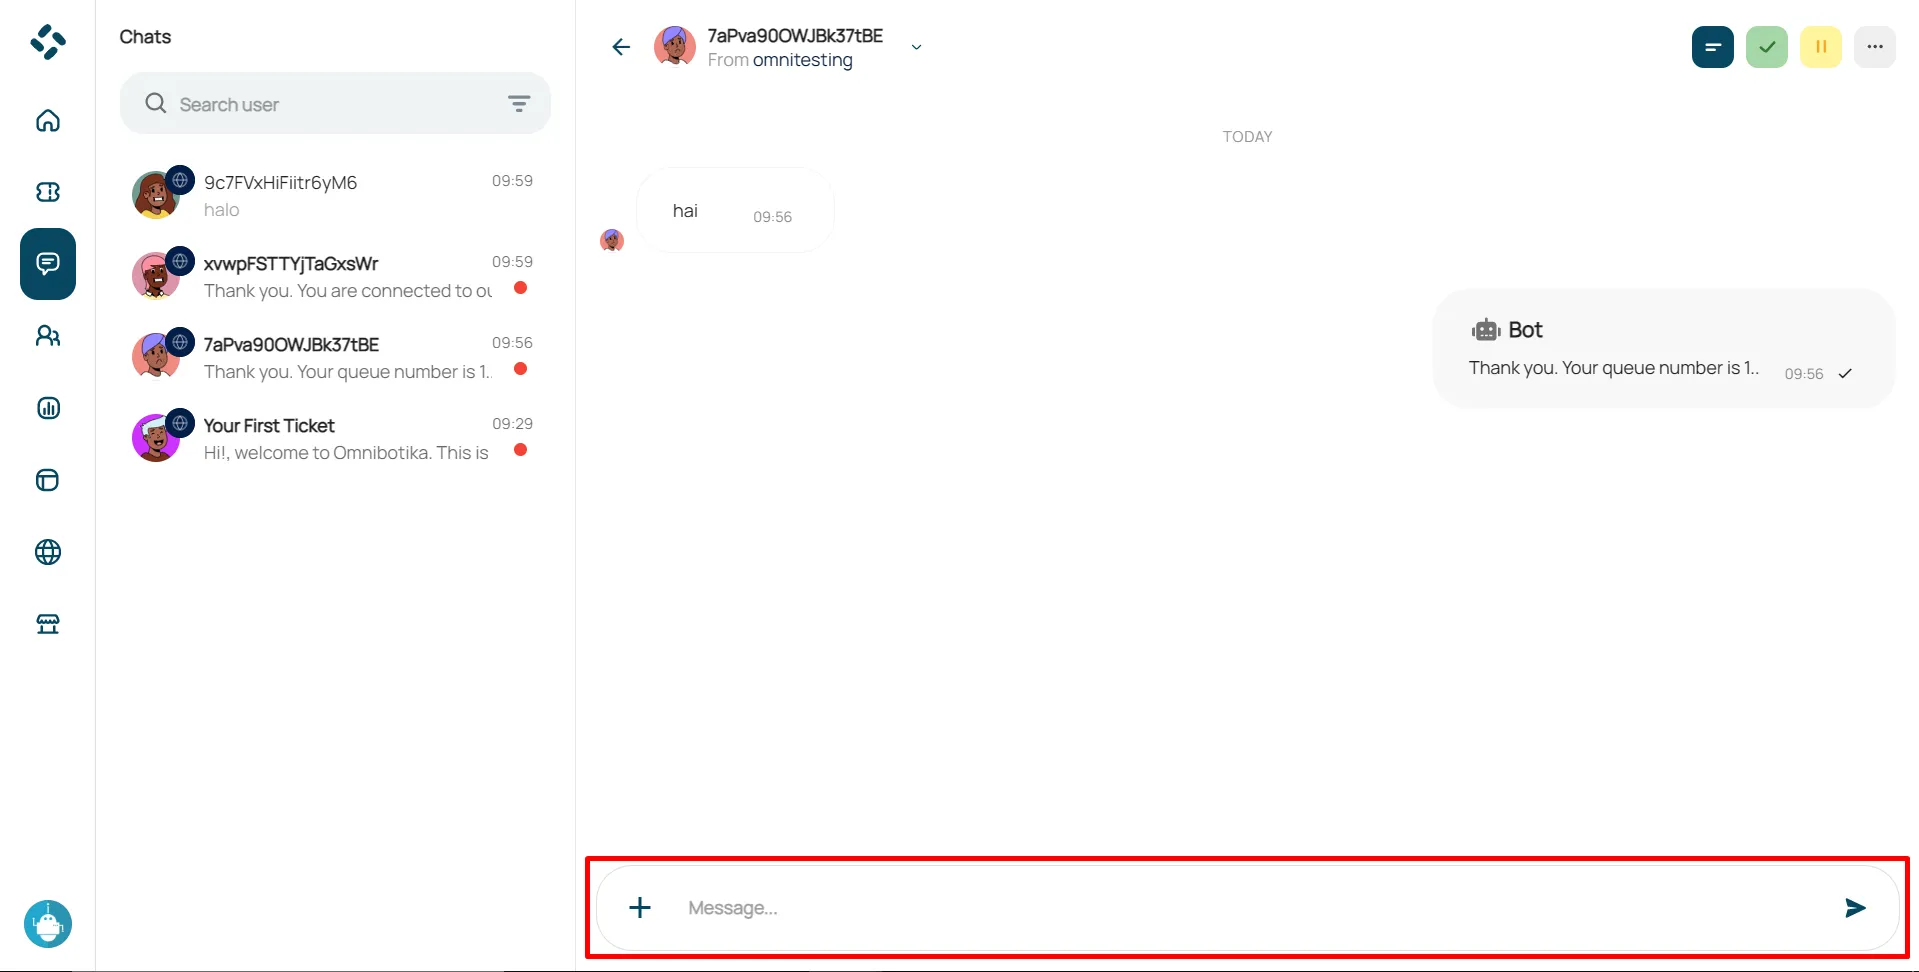
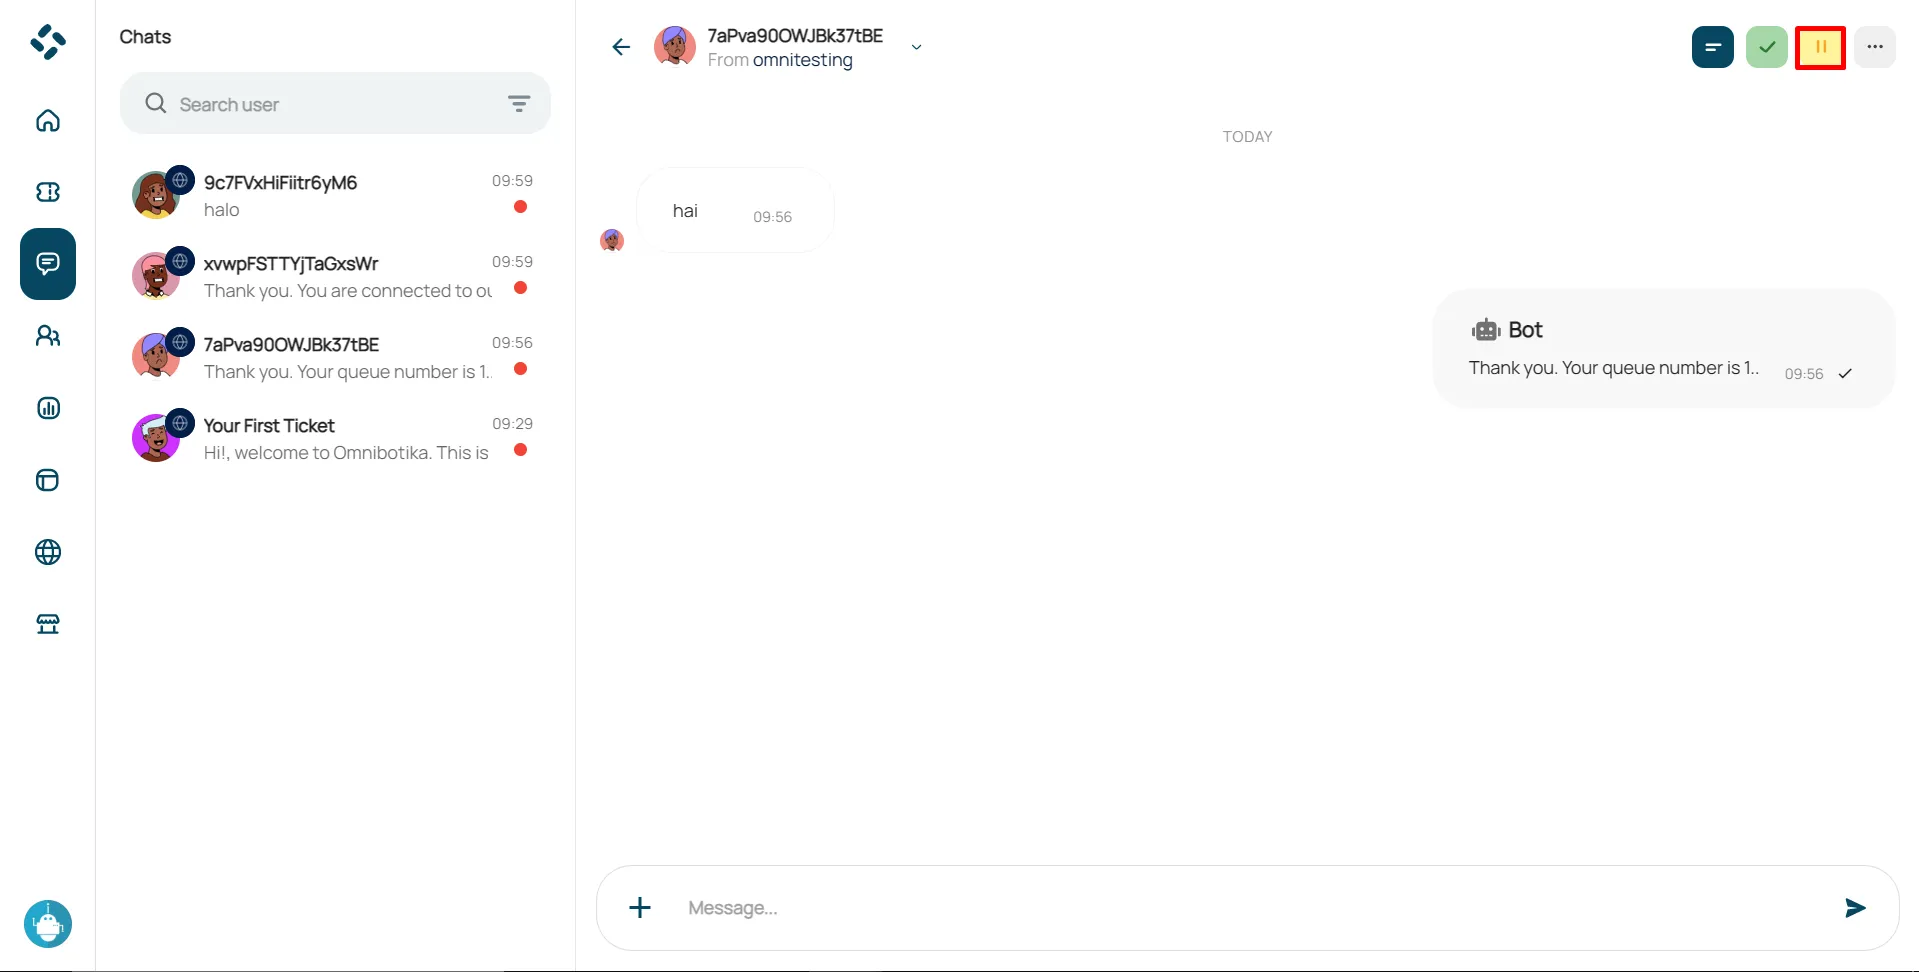
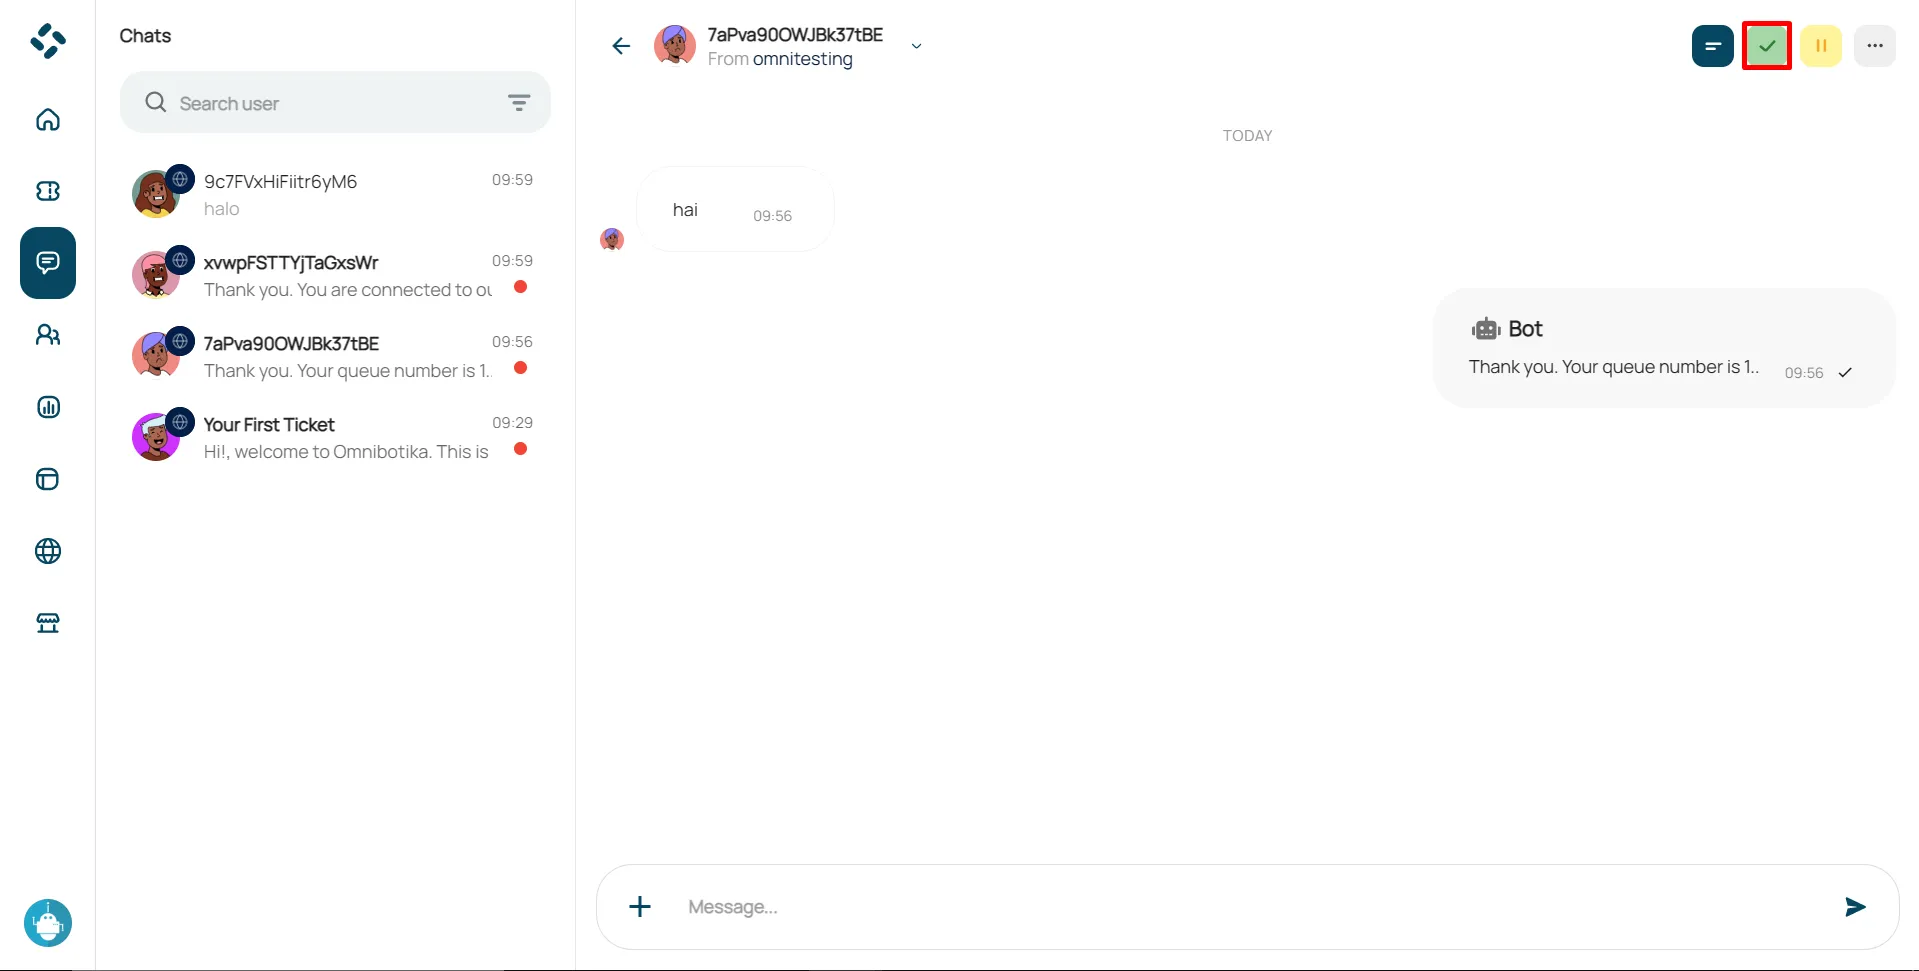
To hold or un-hold a ticket, click the pause icon on the chat console navigation.
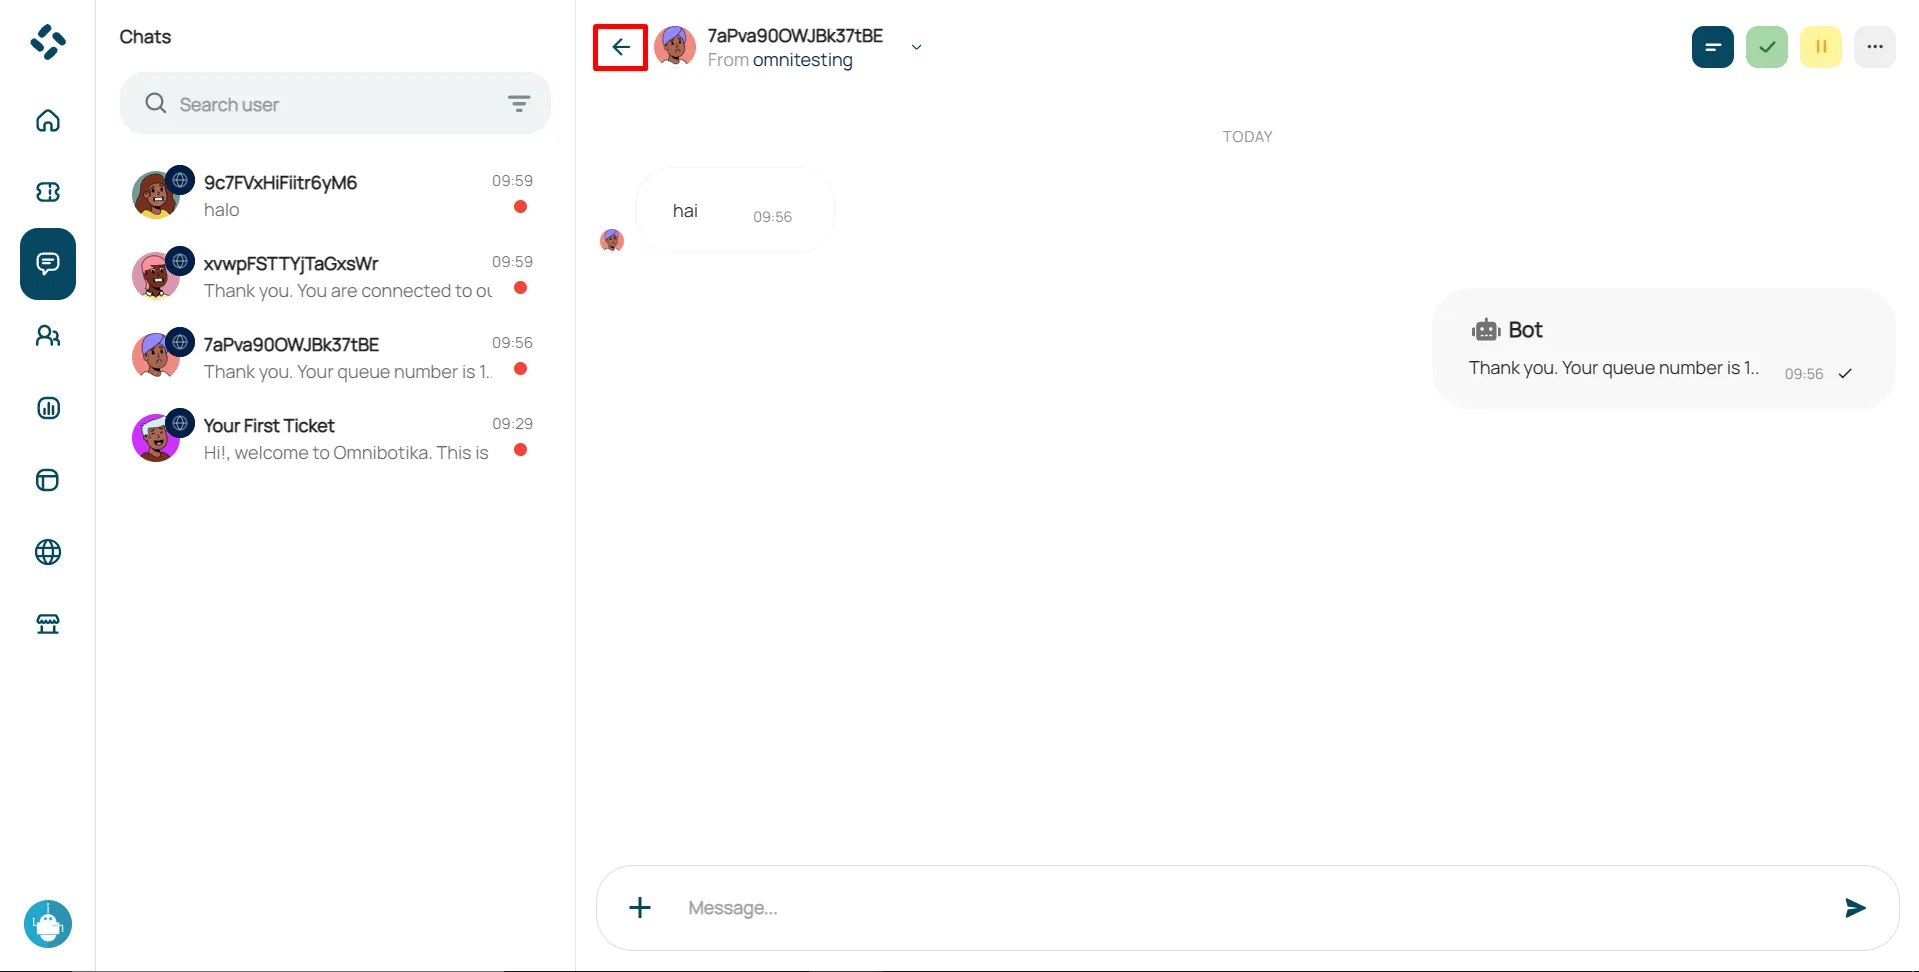
To minimize the ticket, click the minimize icon on the chat console navigation.
When you have finished handling the customer, please click the "End Chat" button to end the conversation. The ticket status will change to solved and the conversation will be automatically closed.
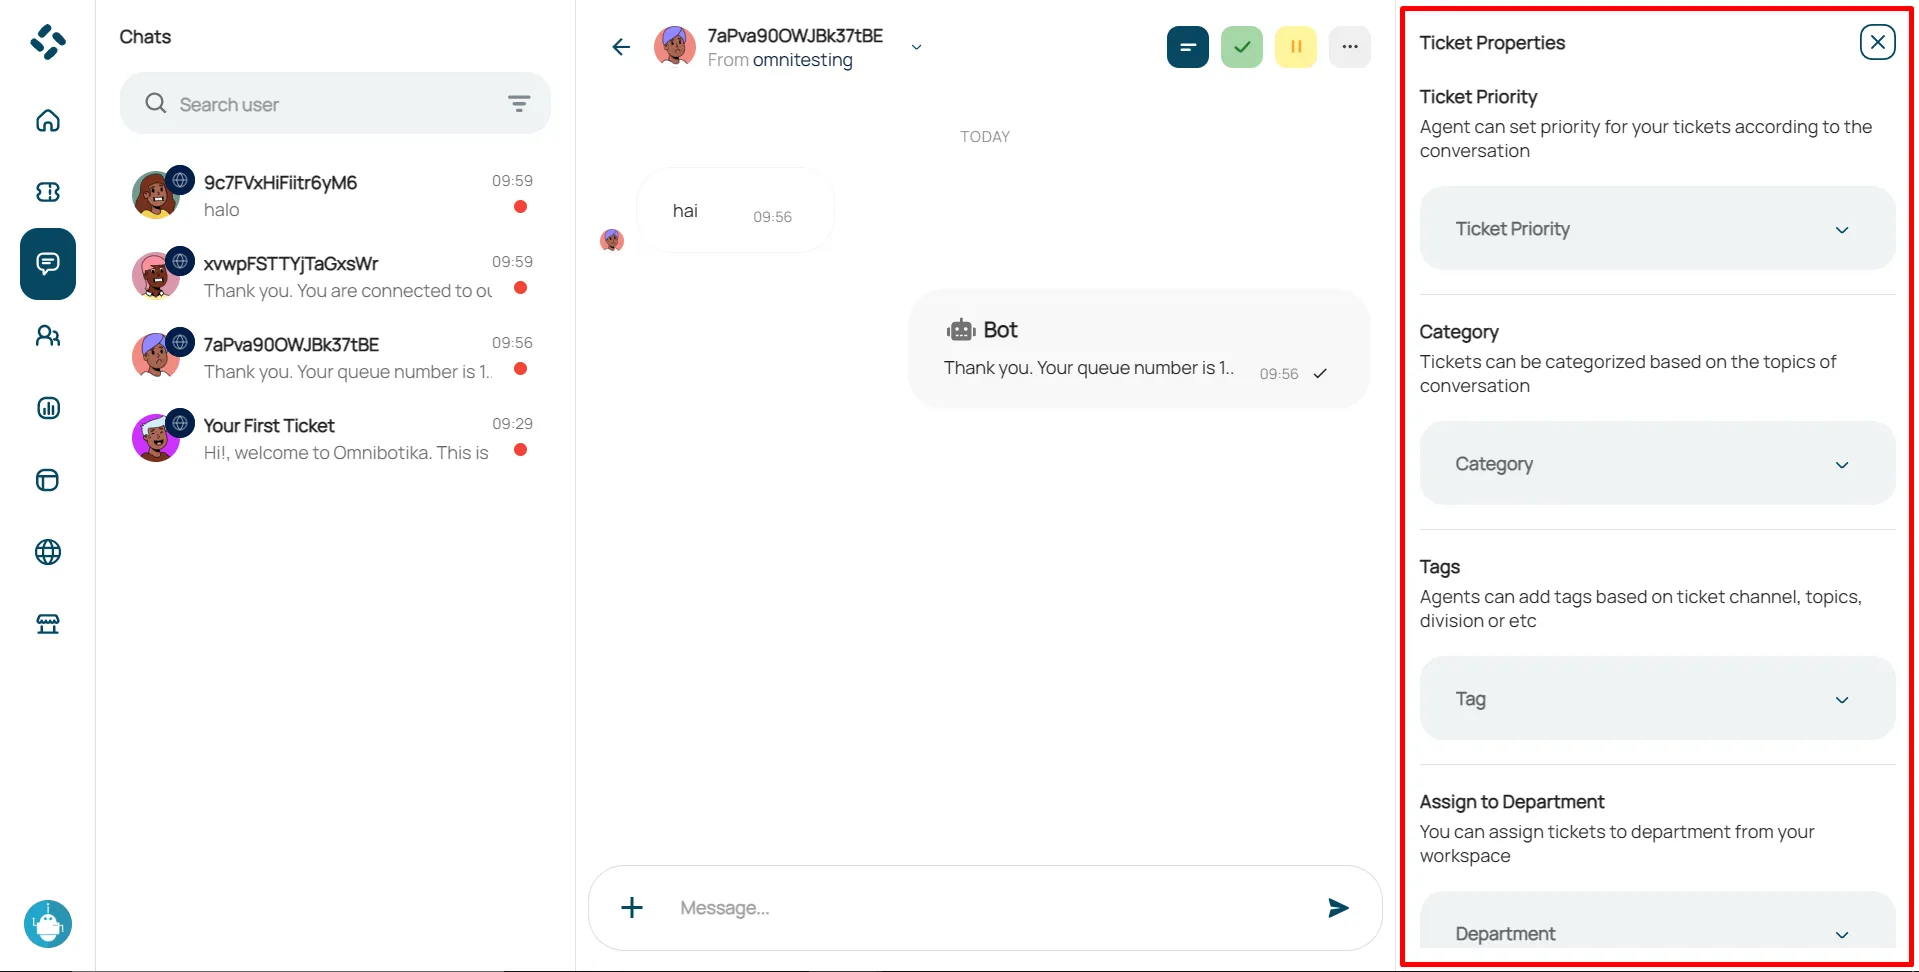
Ticket Properties
Follow these steps to edit the property of a ticket :
Click the three dots icon on the chat console navigation.
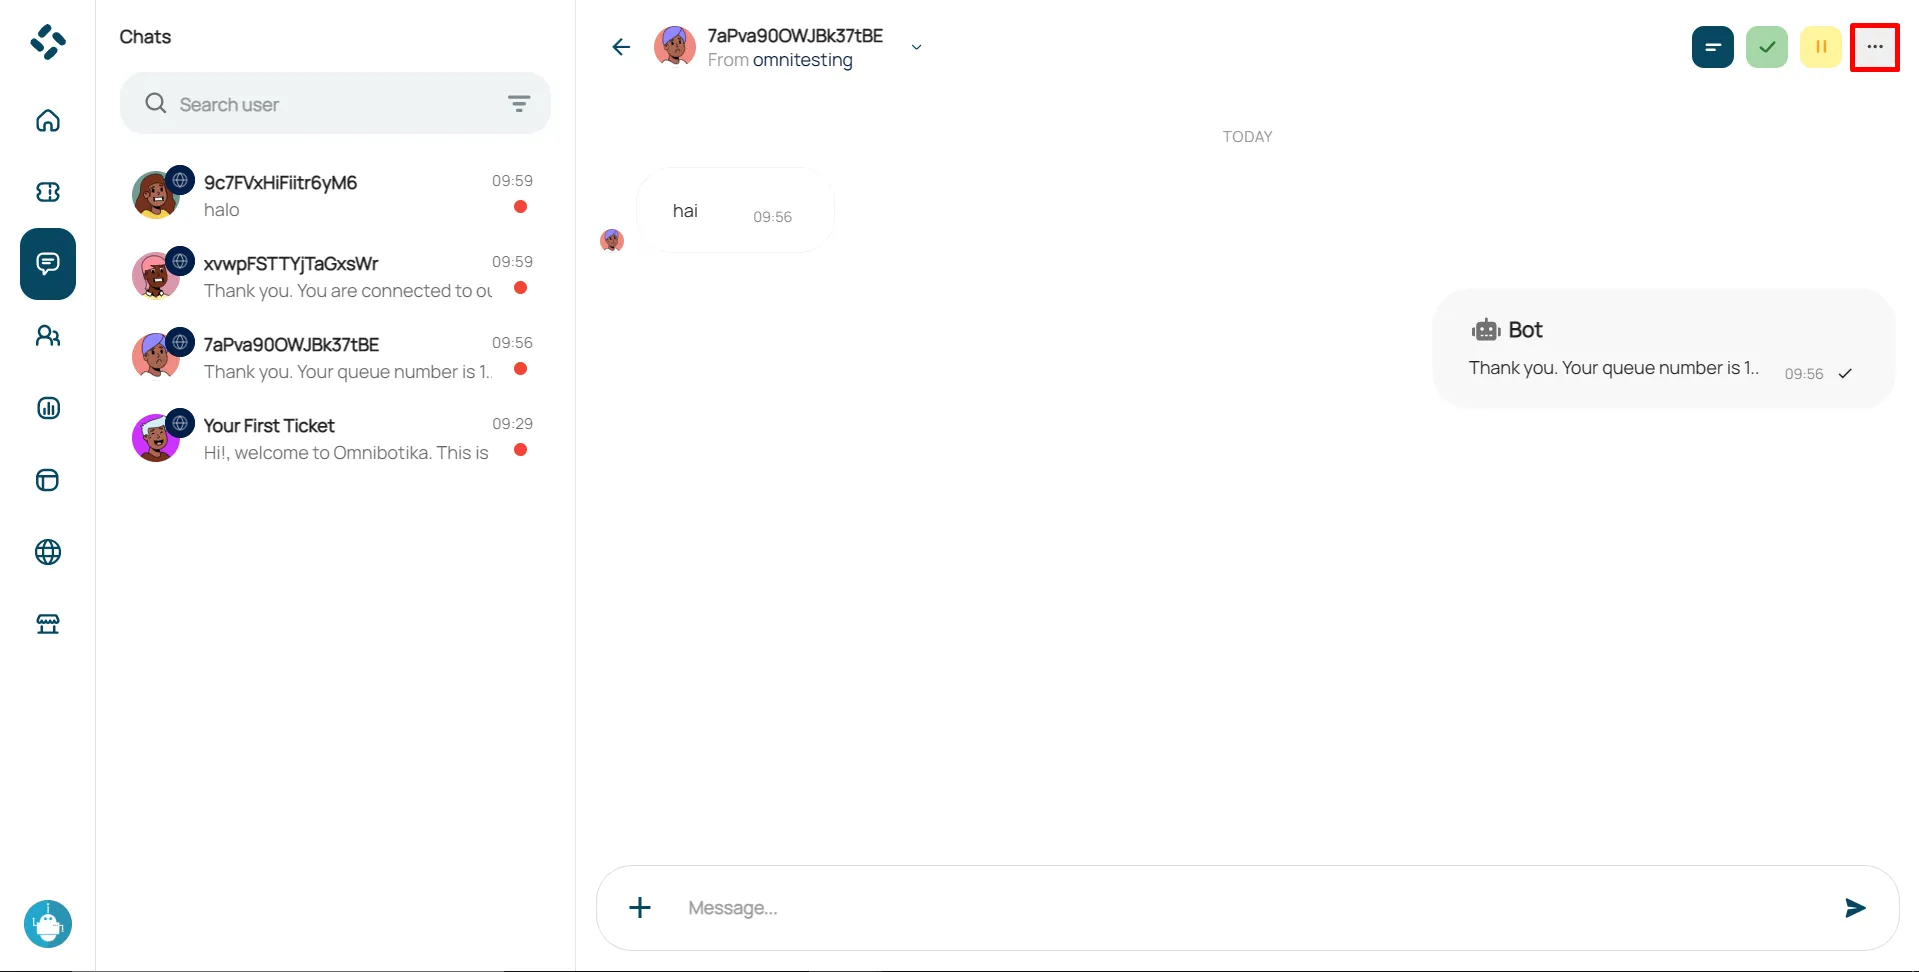
You can change the priority ticket, add categories and tags, or send the ticket to another agent.
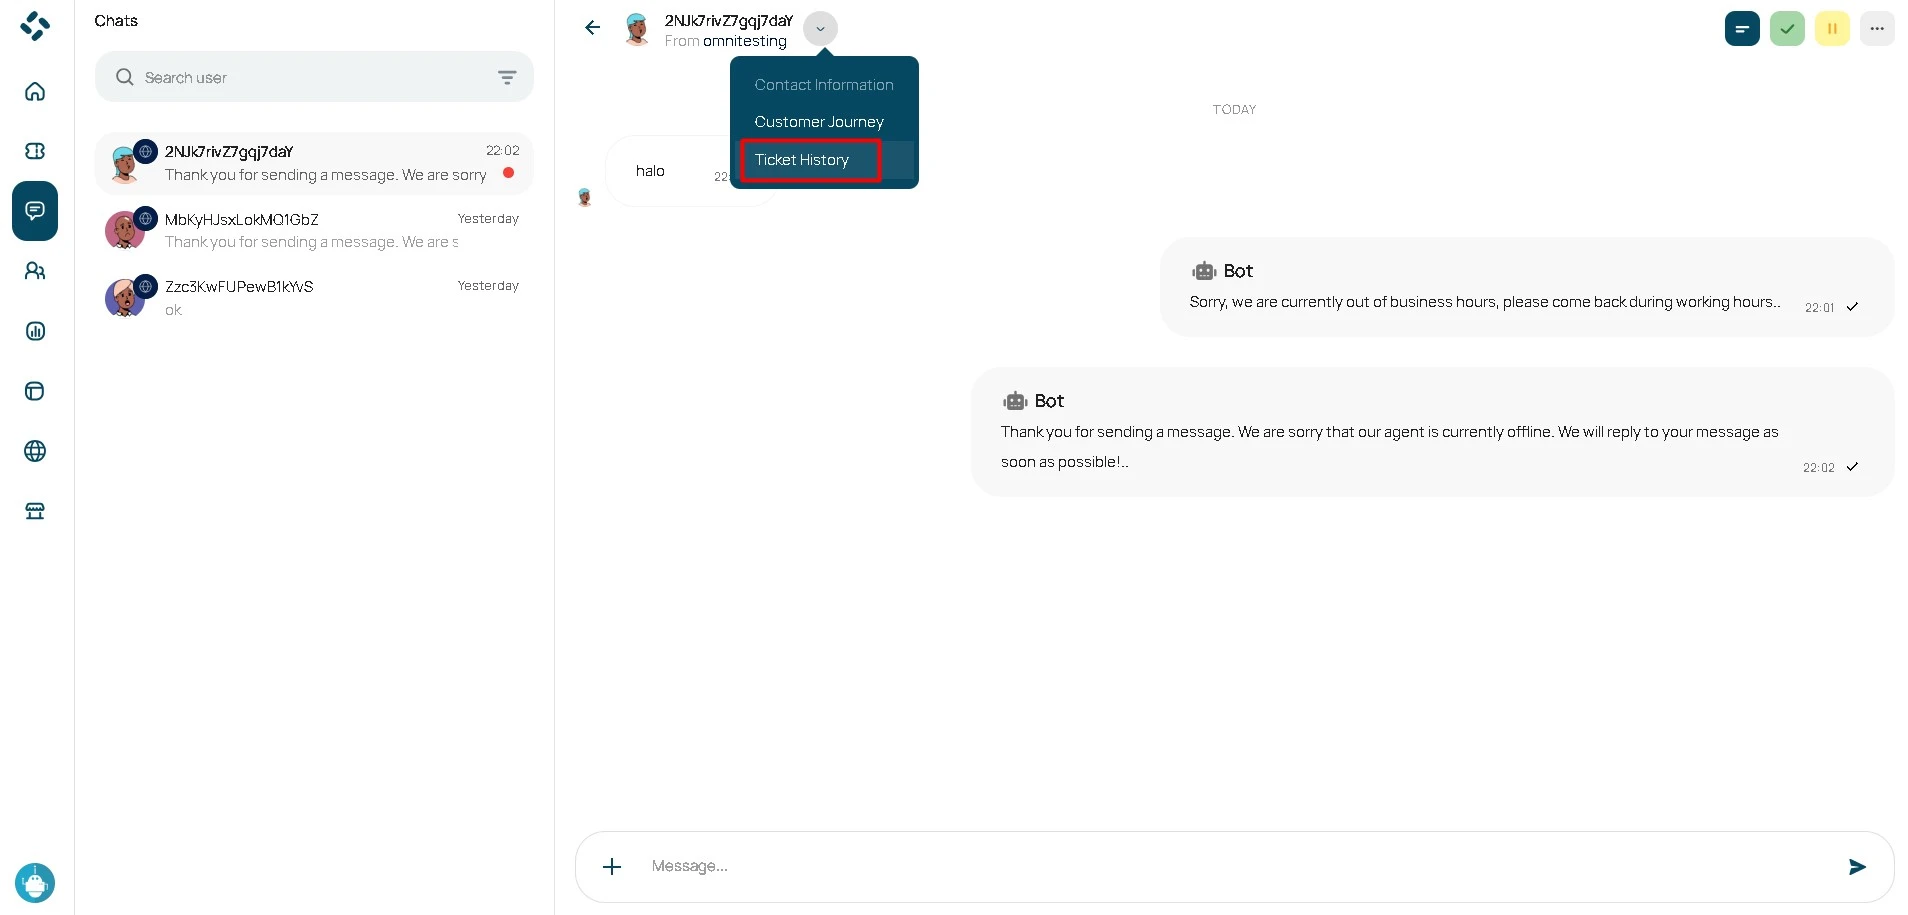
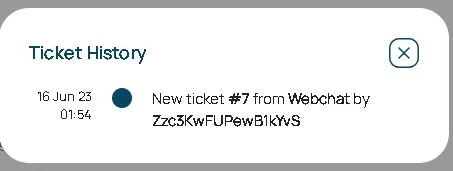
Ticket History
Follow these steps to view the ticket history :
Select the message you want to reply to. Click the down arrow icon on the chat console navigation. then click history ticket.
After that, a ticket history will appear that contains the time information of the ticket.
Save Contact
Follow these steps to save contacts from the chat console :
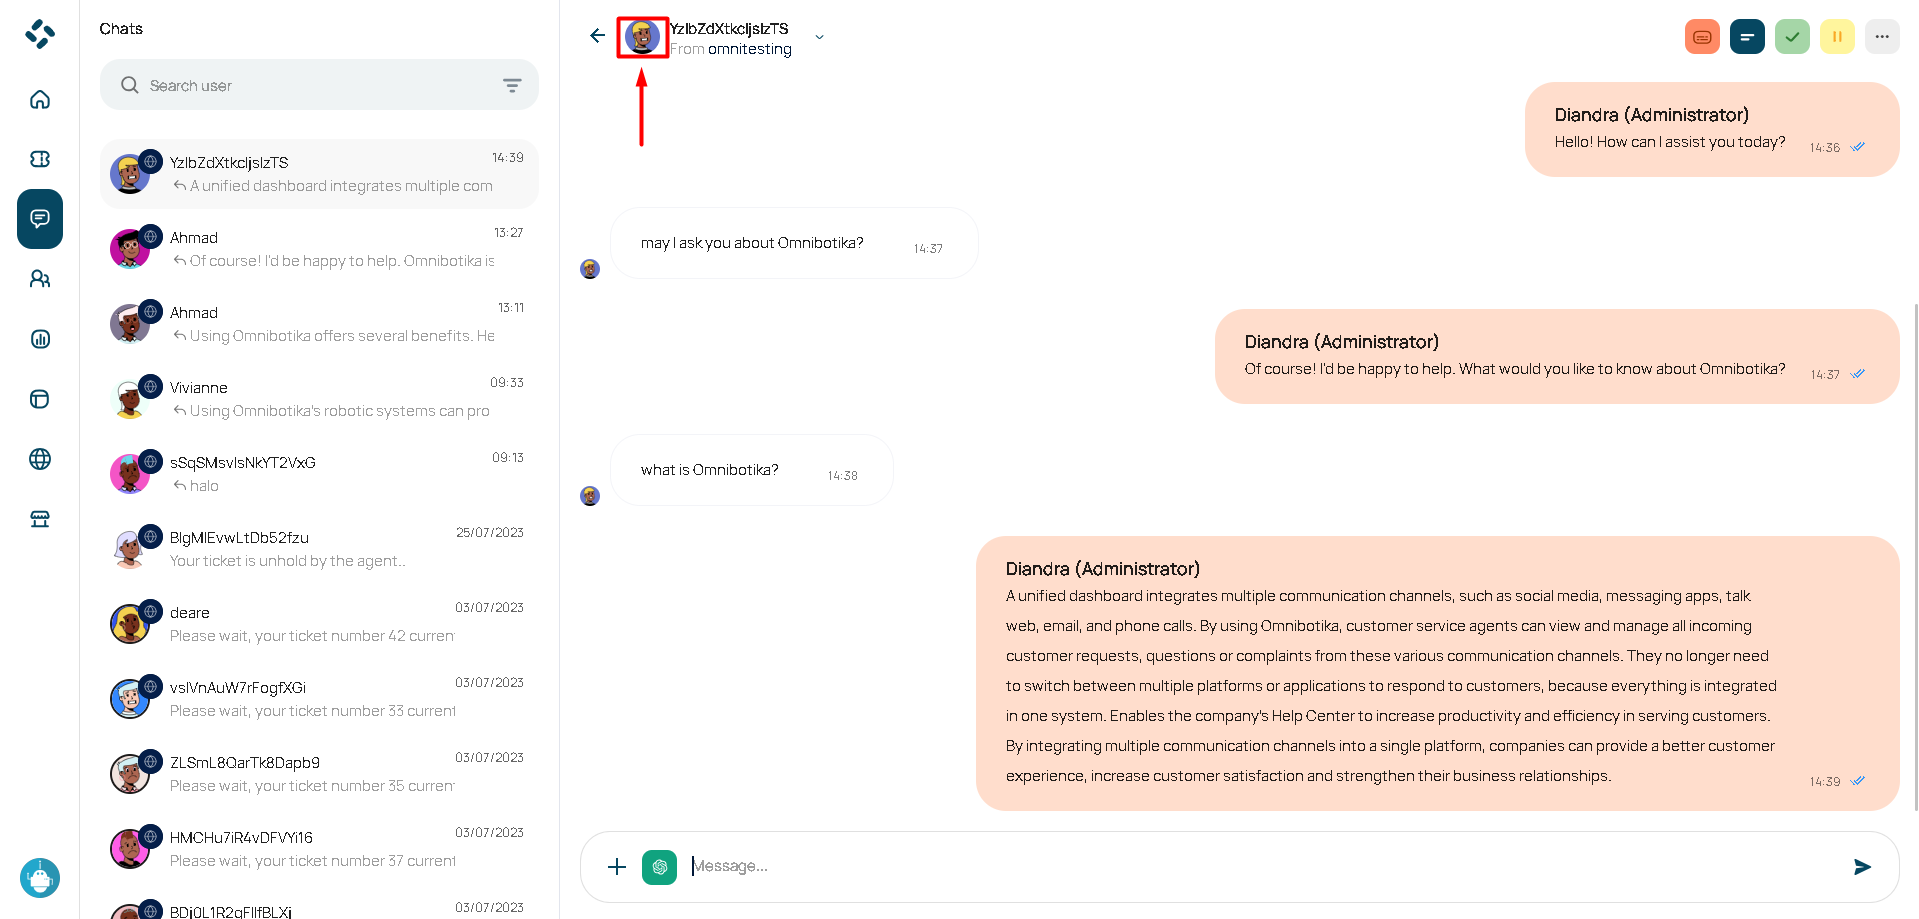
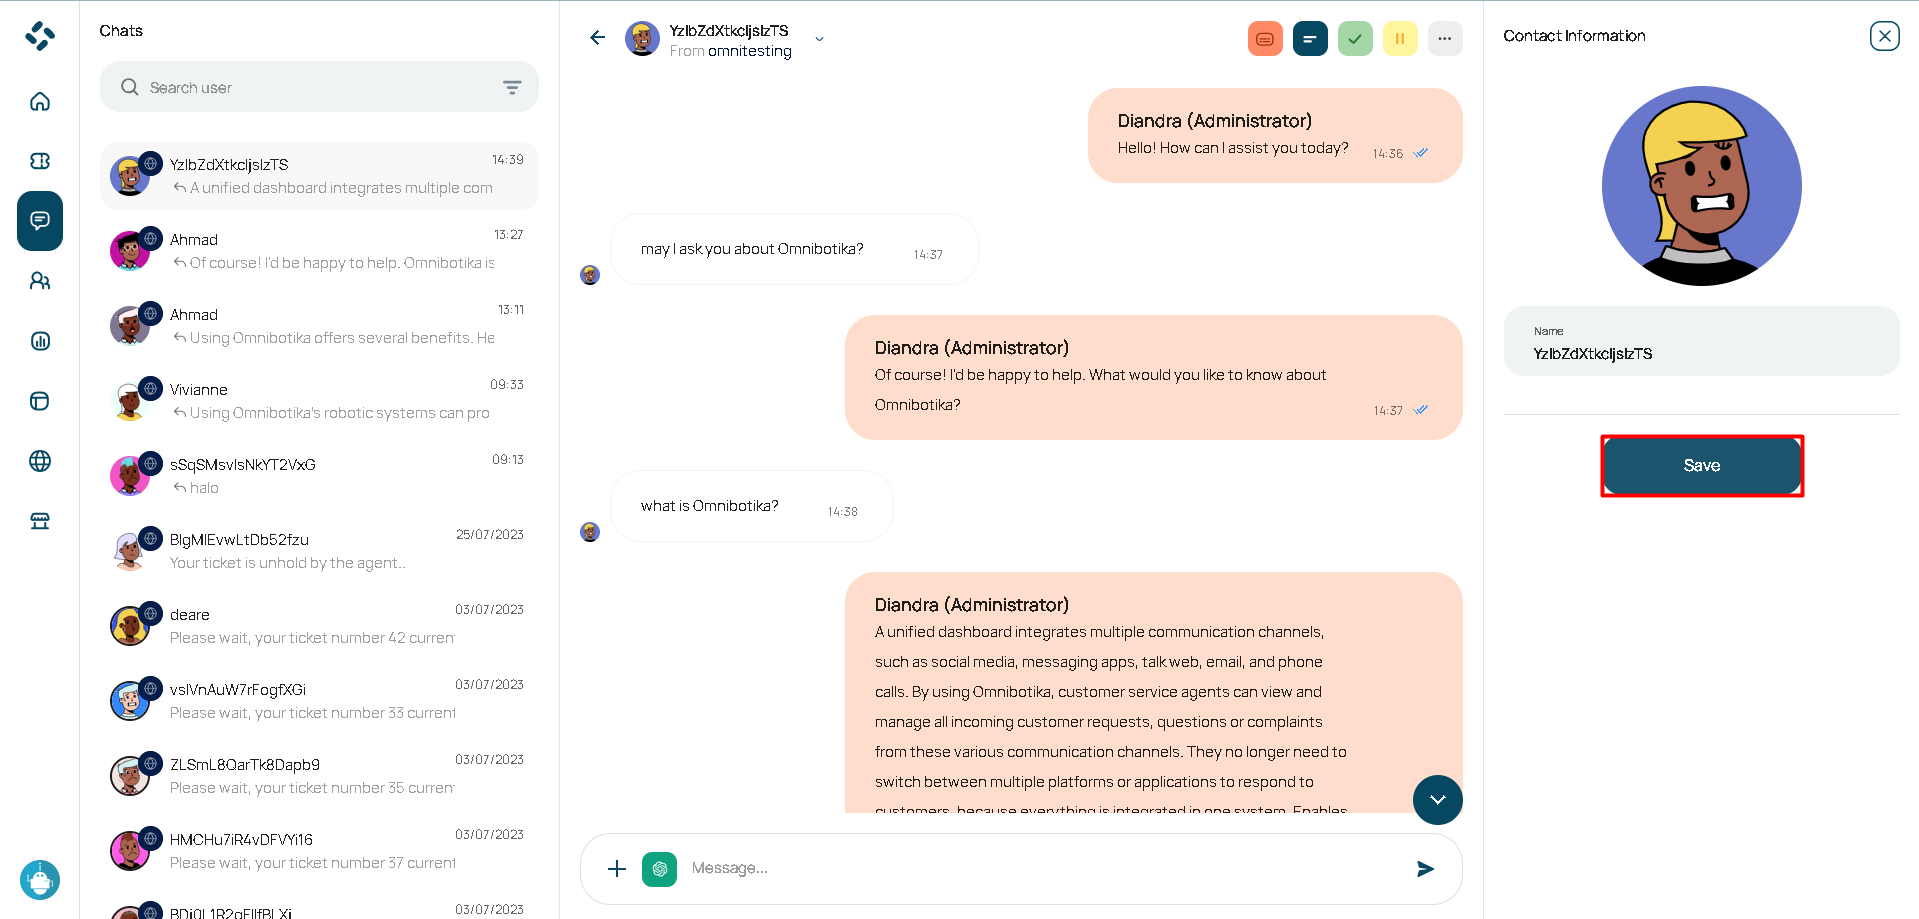
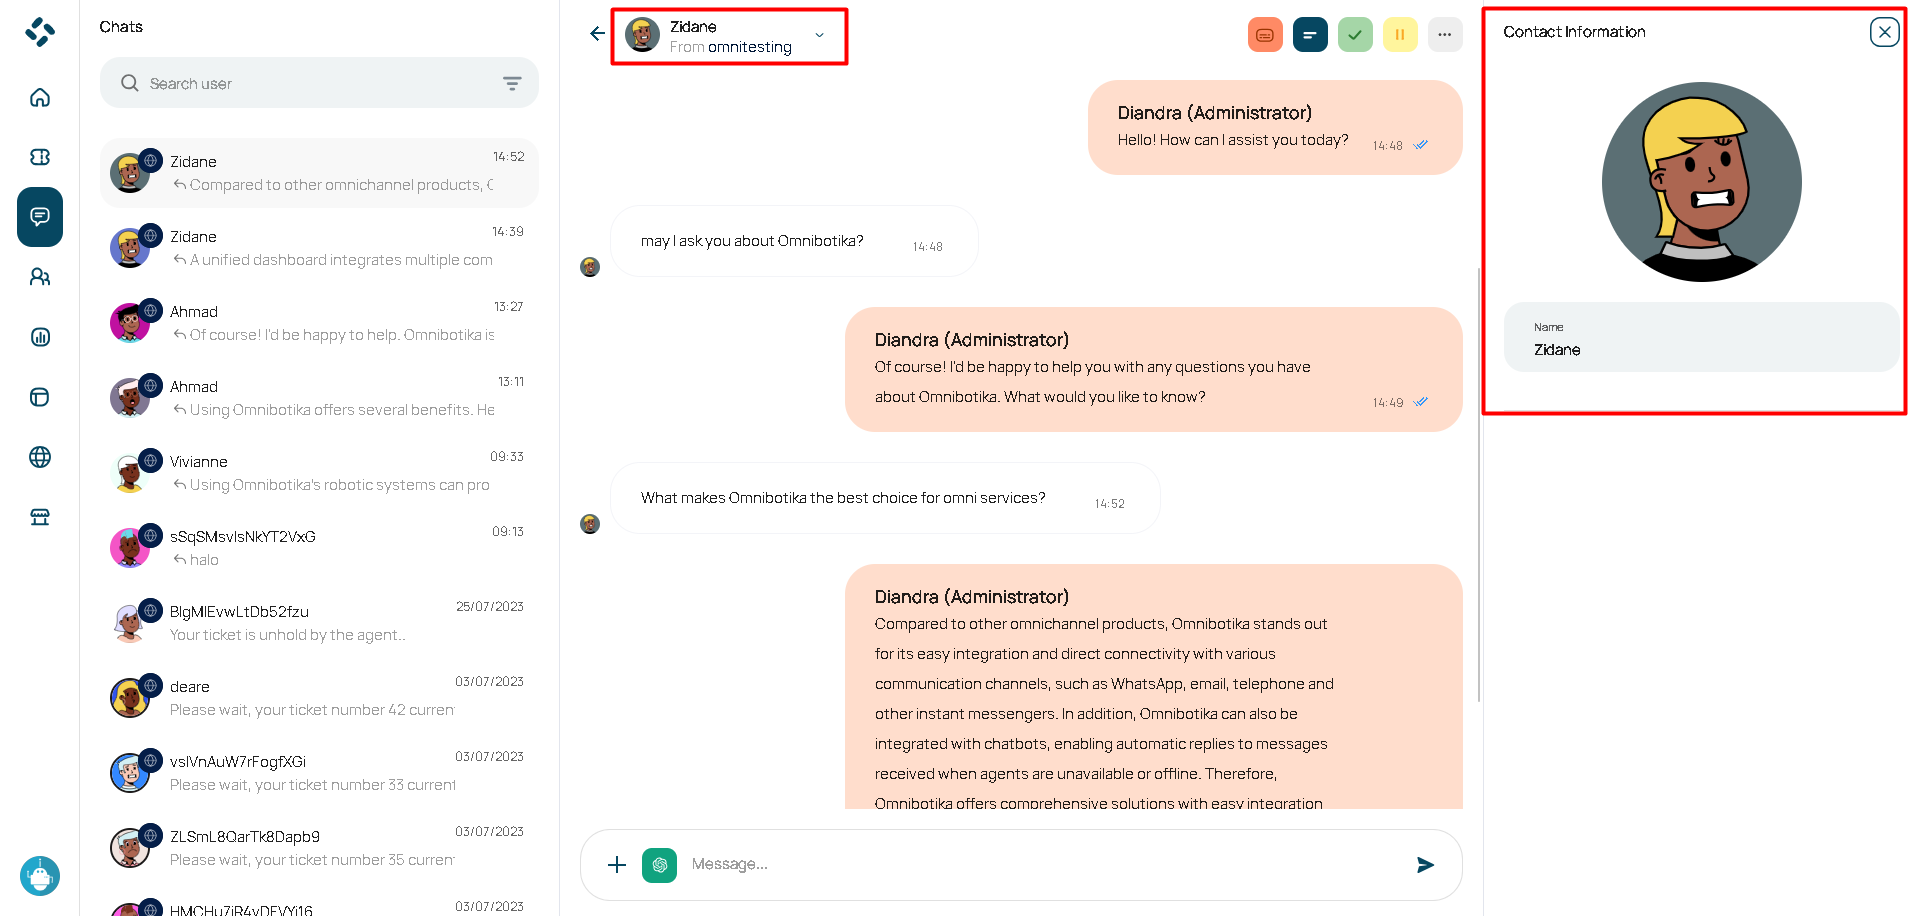
Select the message that you want to save the contact. Click the user profile icon.
In the Contact Information section click the "Save" button.
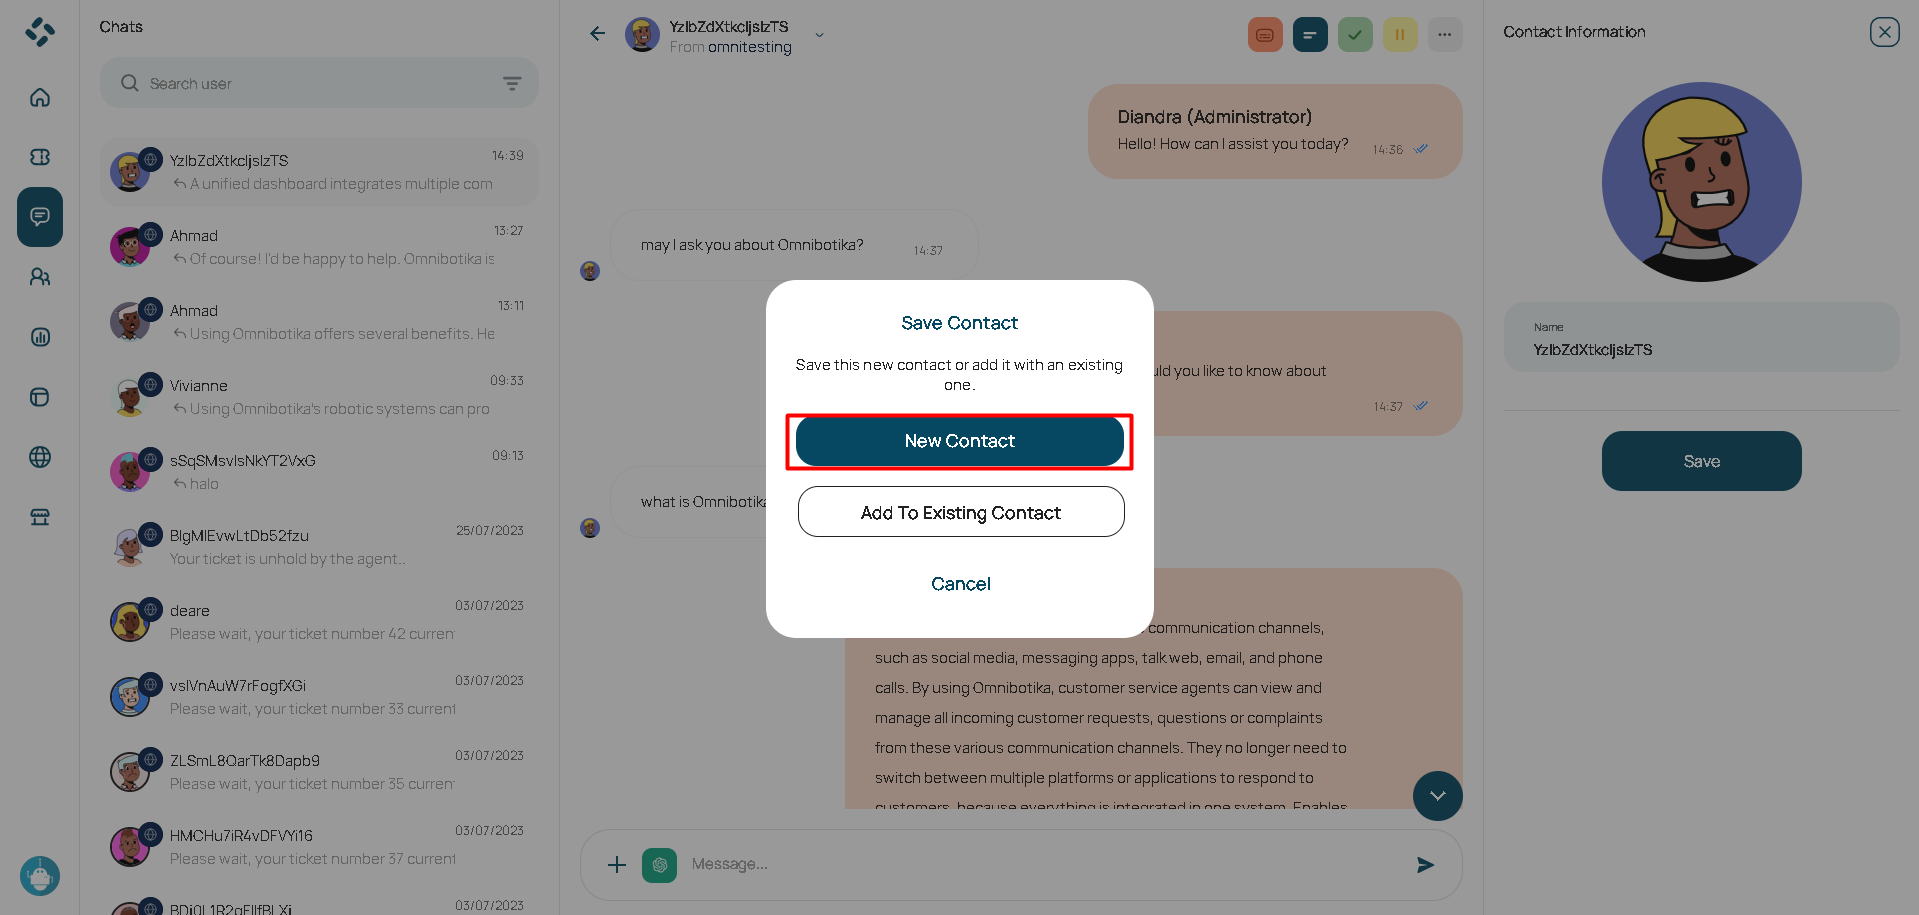
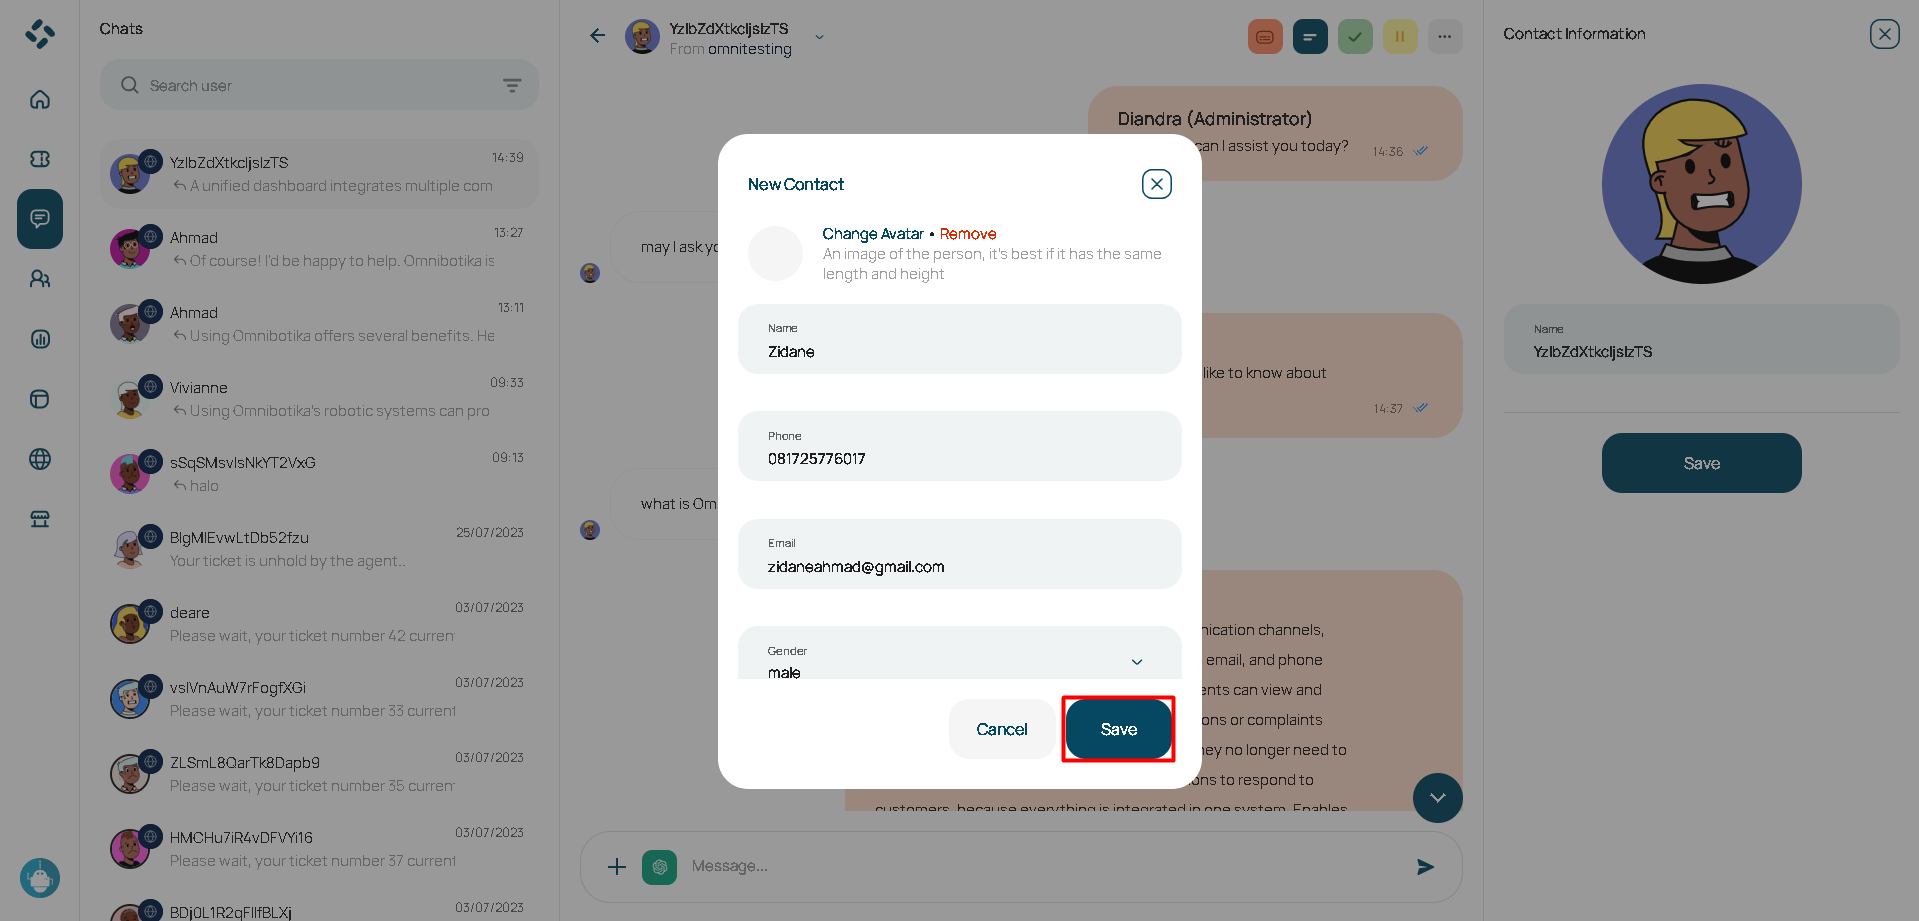
In the save contact section select the "New Contact" button then click. This is to create a new contact that has never existed before.
Fill in the contact information as below. Then click the "Save" button to save the contact.
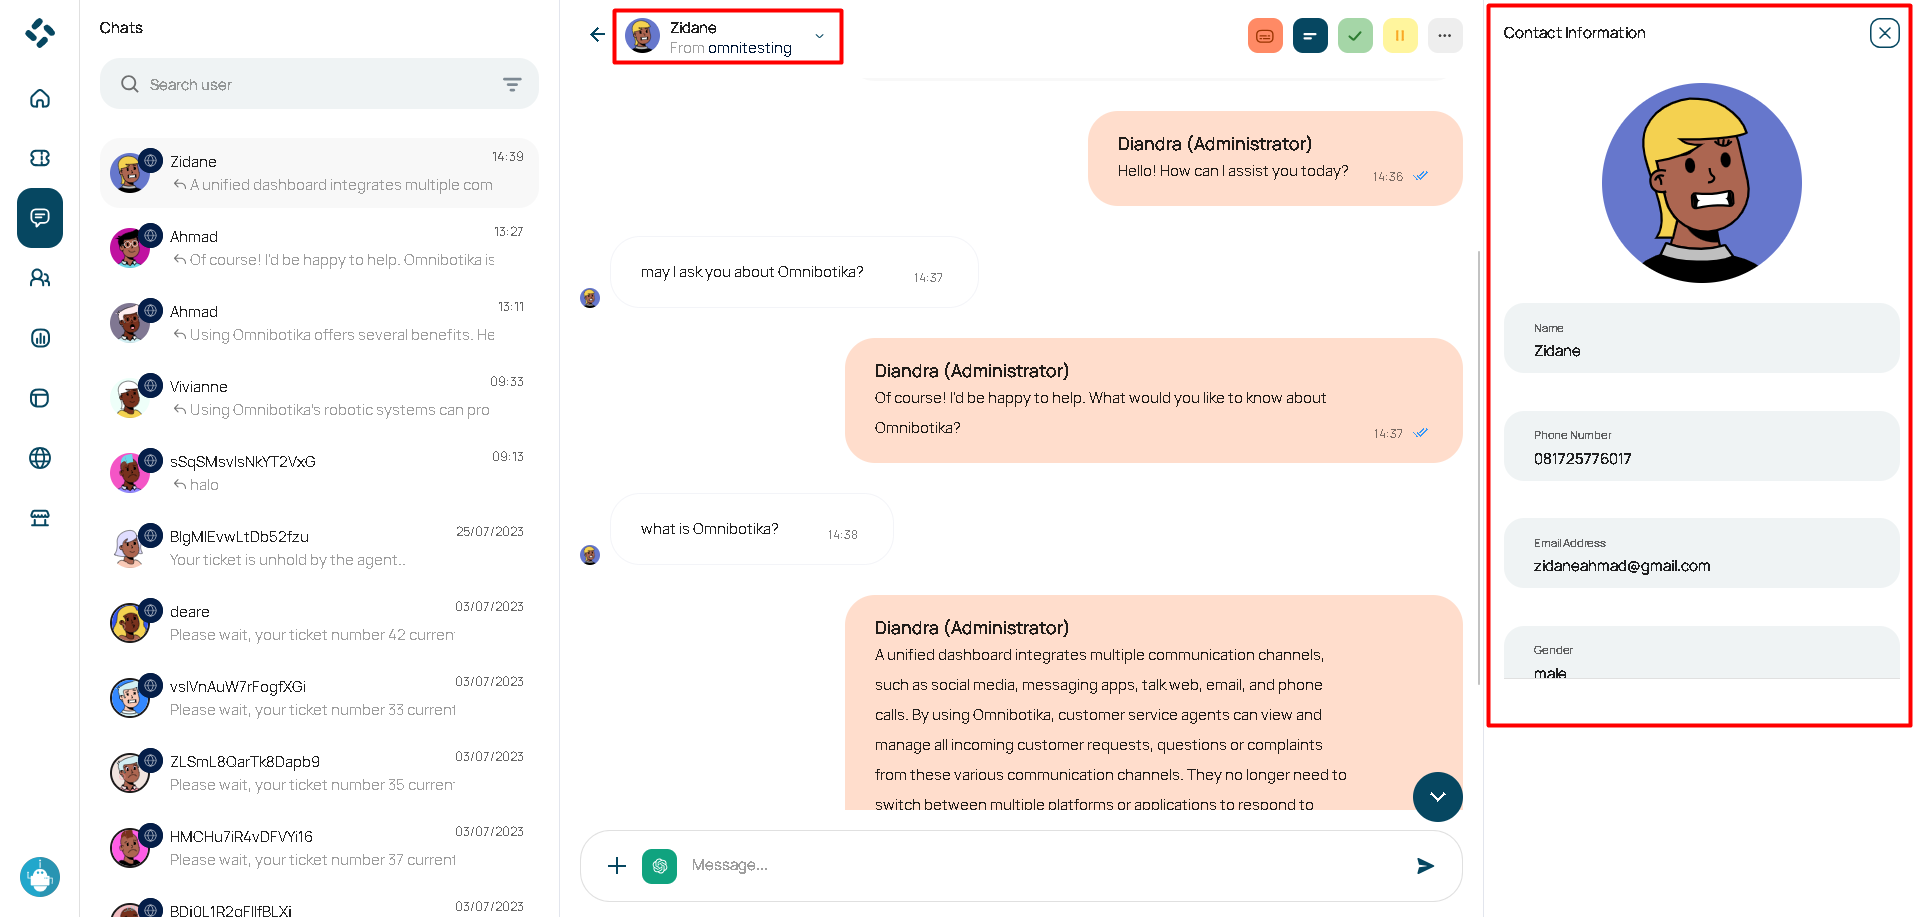
After clicking the save button, the contact will be saved. This can be seen in the name next to the profile icon in the top left navigation section and the contact information has changed according to what was edited earlier.
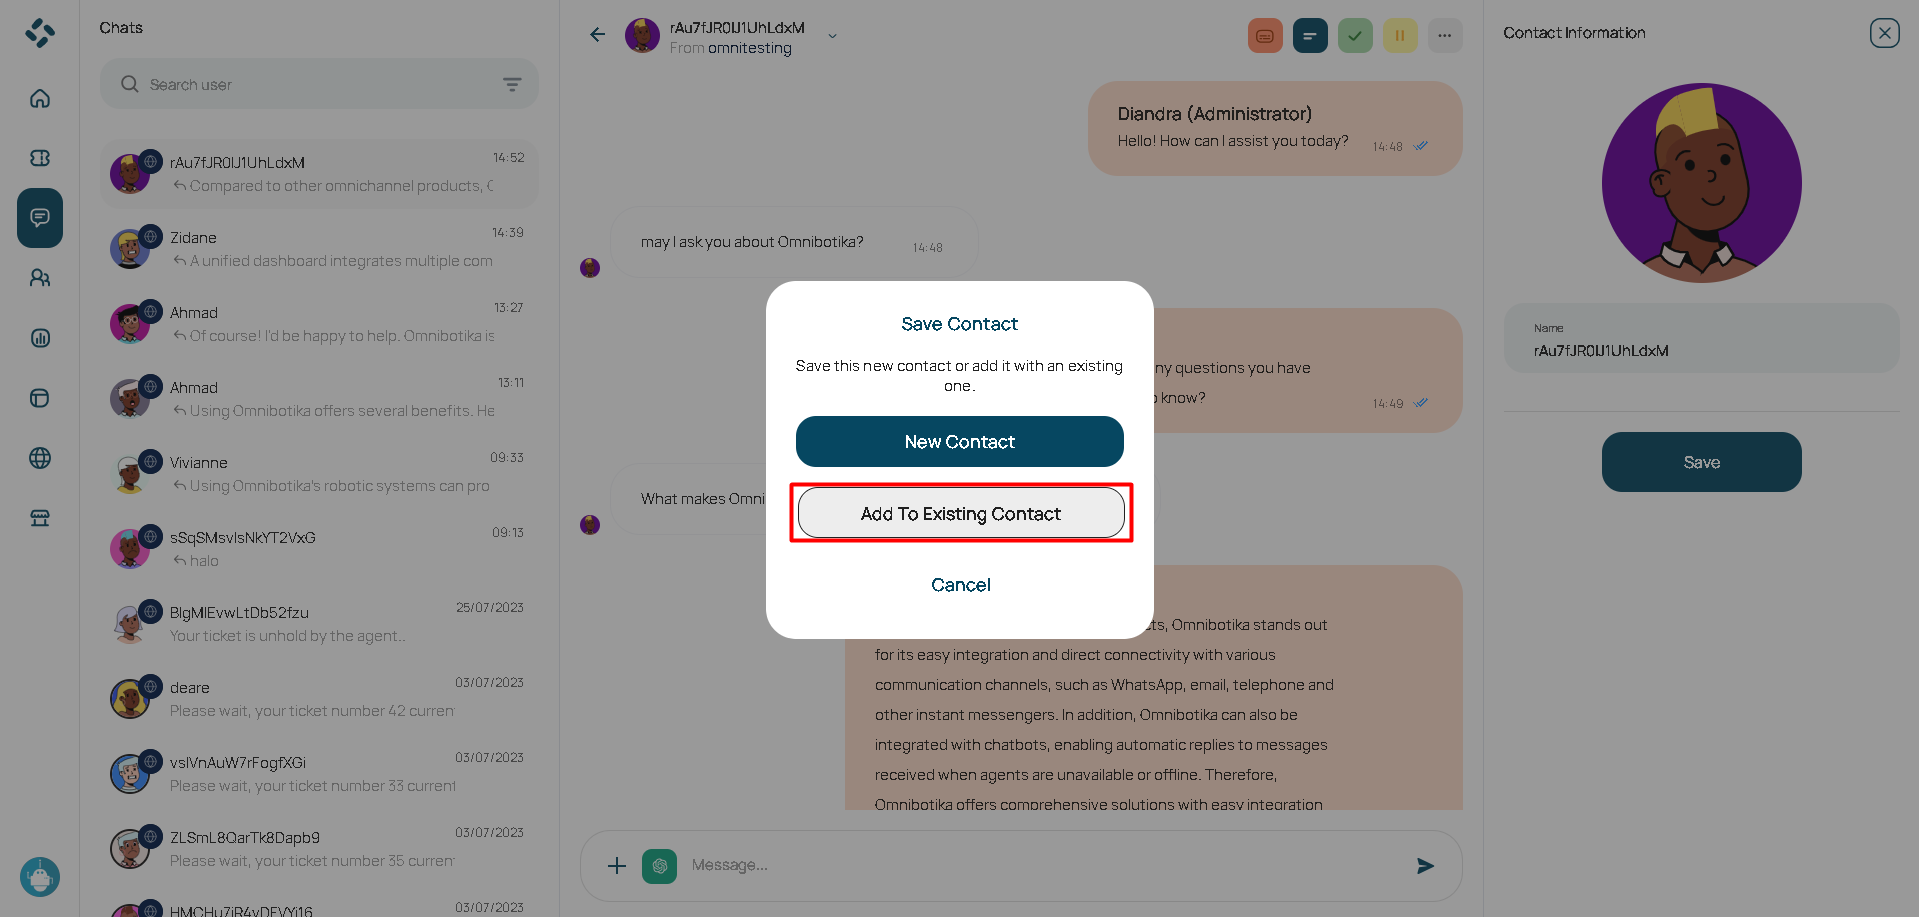
You can also save a contact by adding to an existing contact by following these steps :
In the "Save Contact" section click the Add to Existing Contact button.
Then select the existing contacts to merge. Click the "Merge" button.
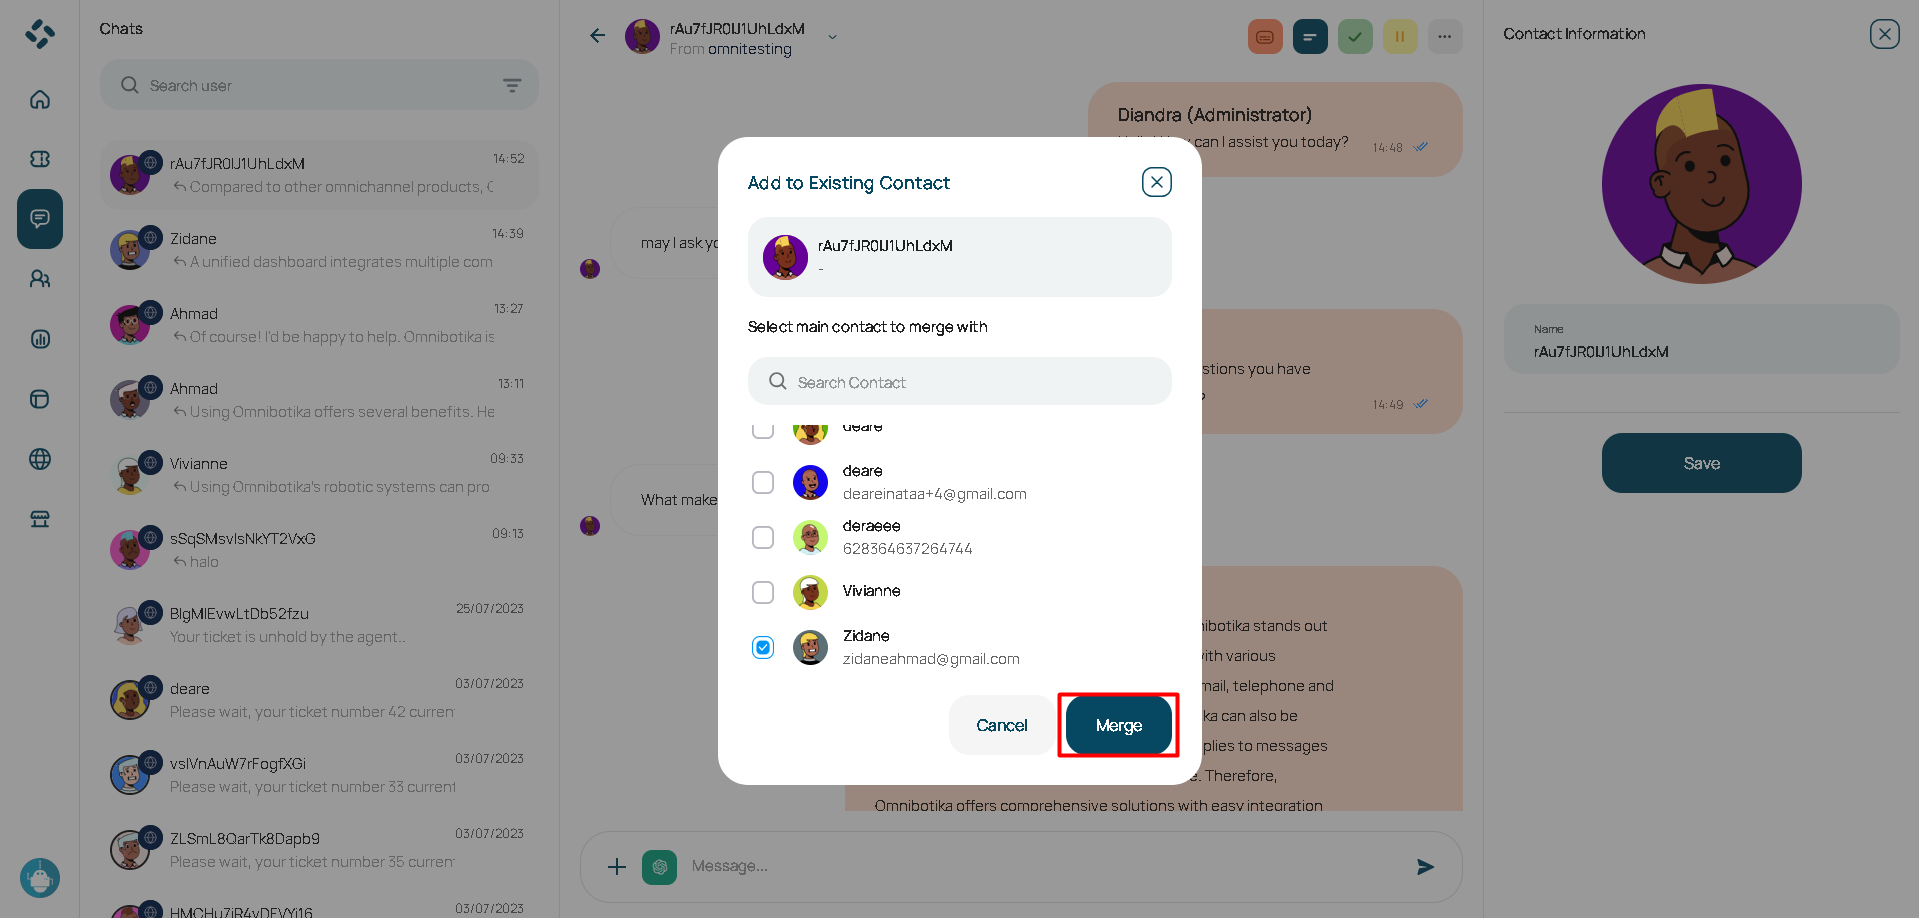
After that, the contact has been successfully merged with existing contacts by seeing the contact name next to the profile icon in the top left navigation and in the contact information section.
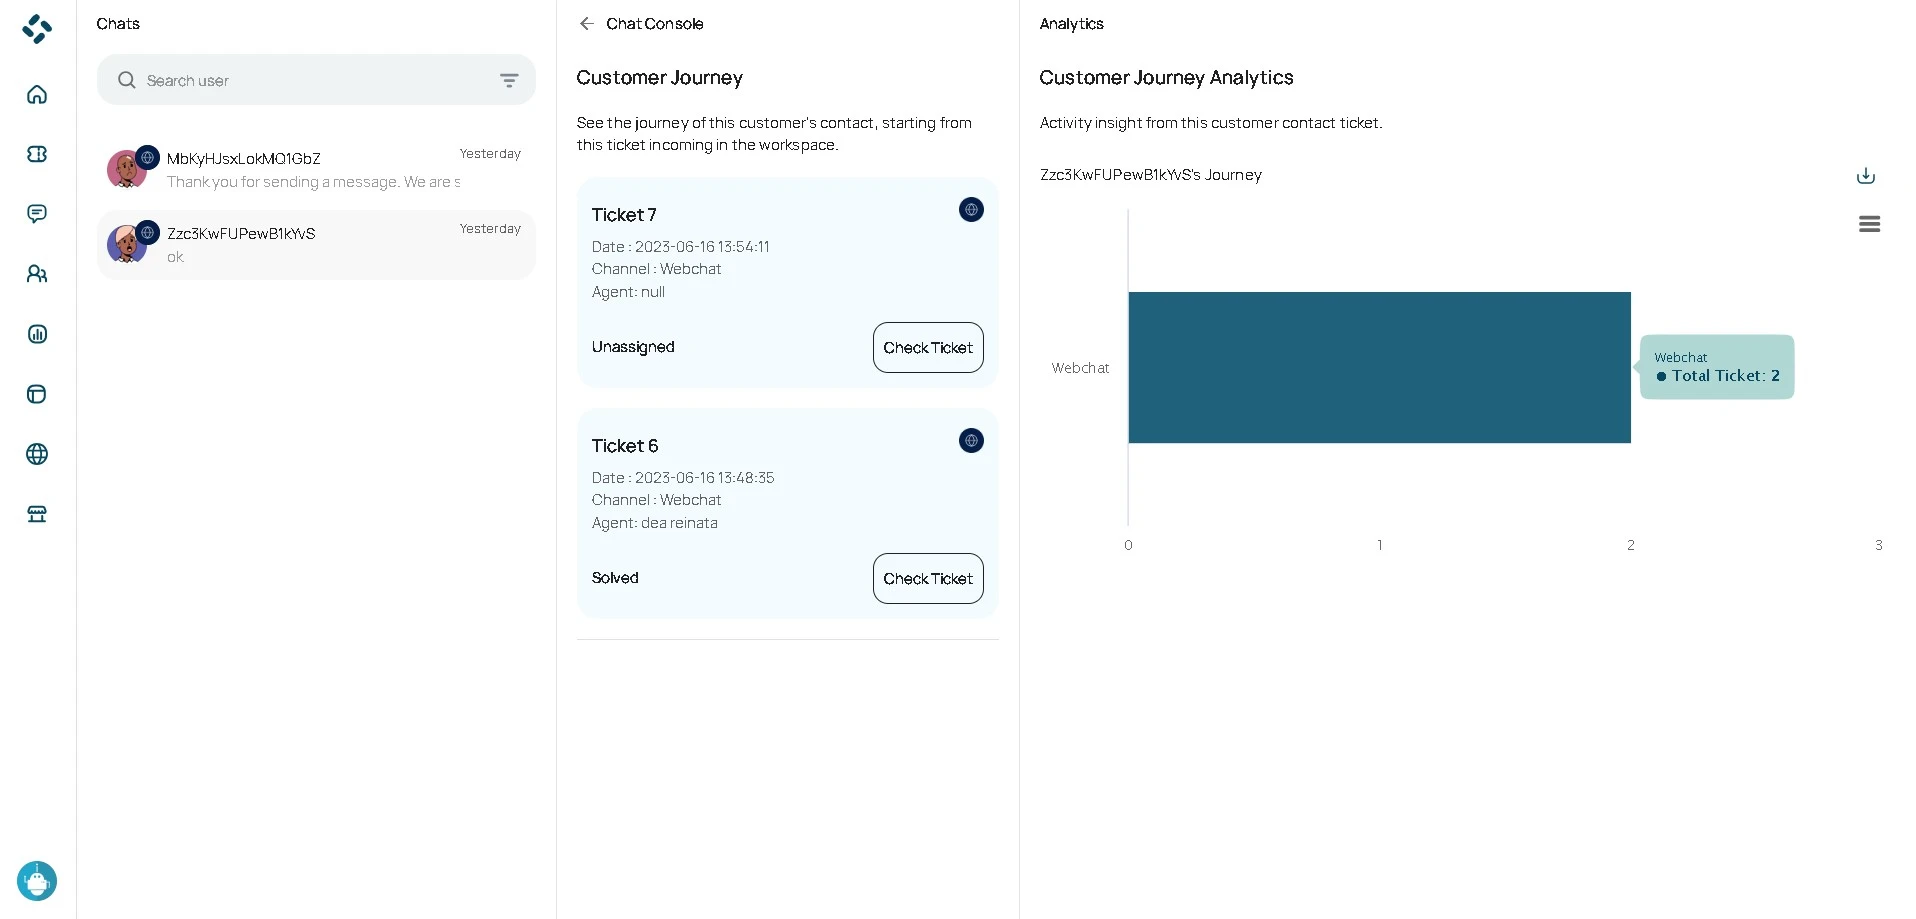
Customer Journey
Follow these steps to view the customer journey :
Select the message you want to reply to. Click the down arrow icon on the chat console navigation. then click customer journey.
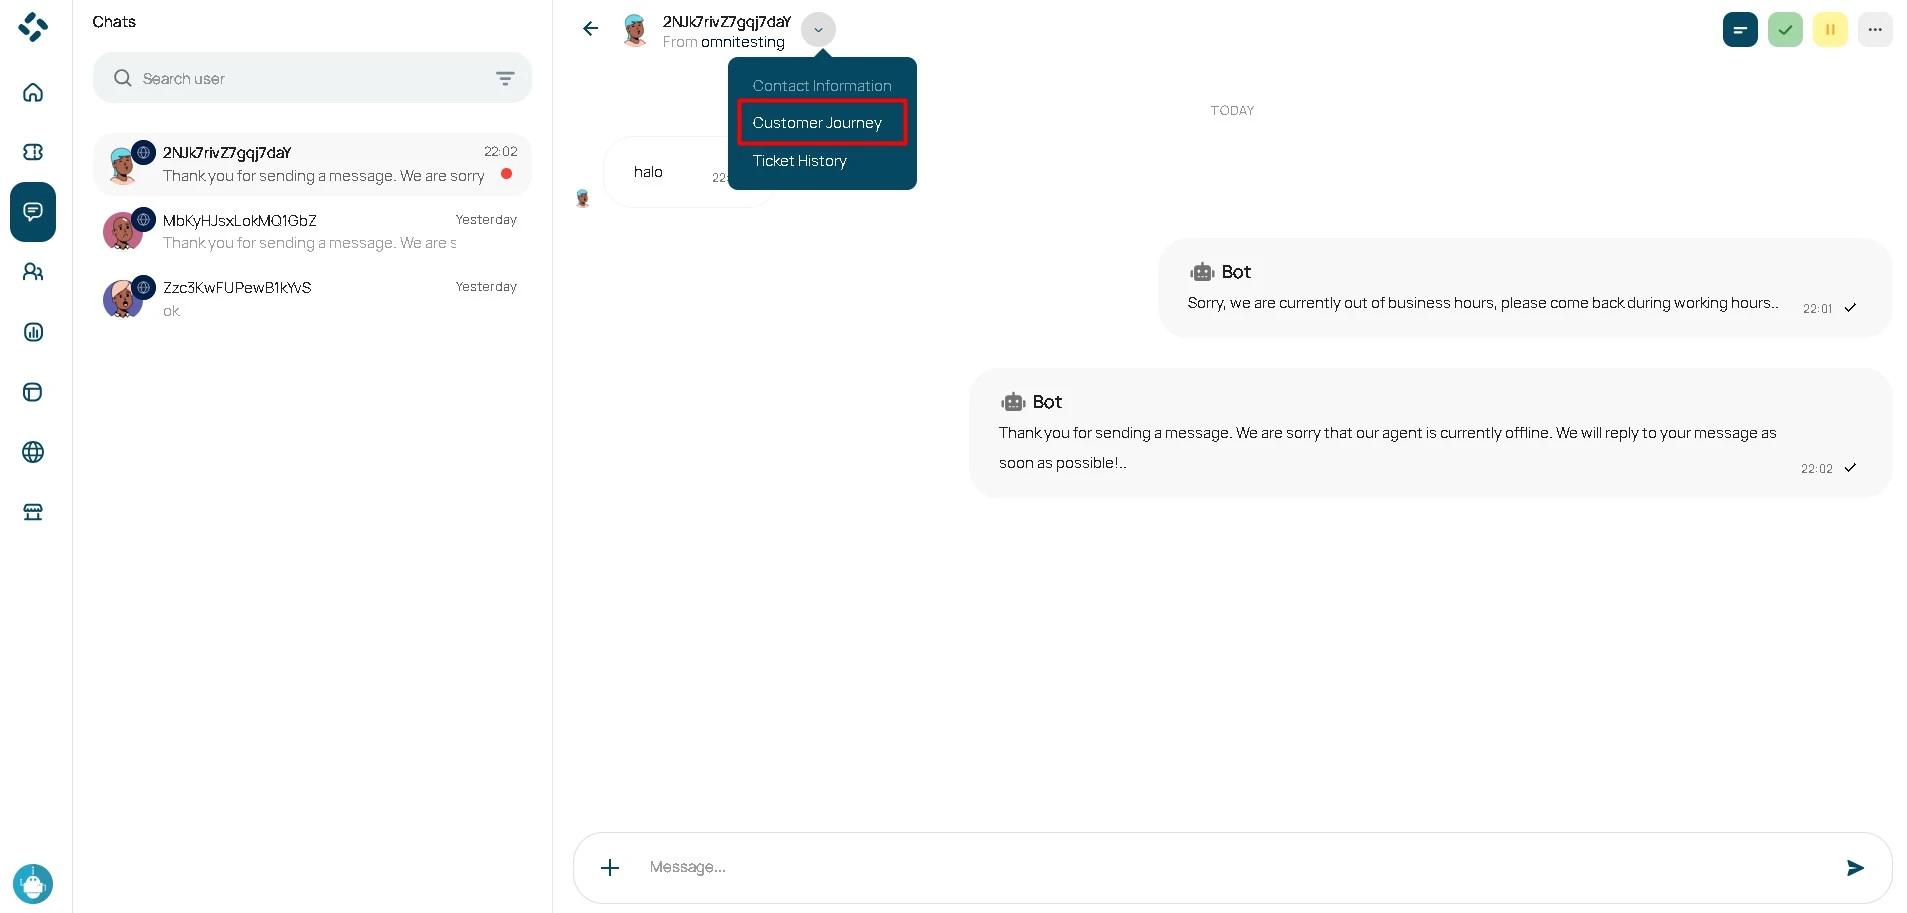
After that, a customer journey will appear that can see the journey of this customer contact, starting from this ticket entering the workspace.
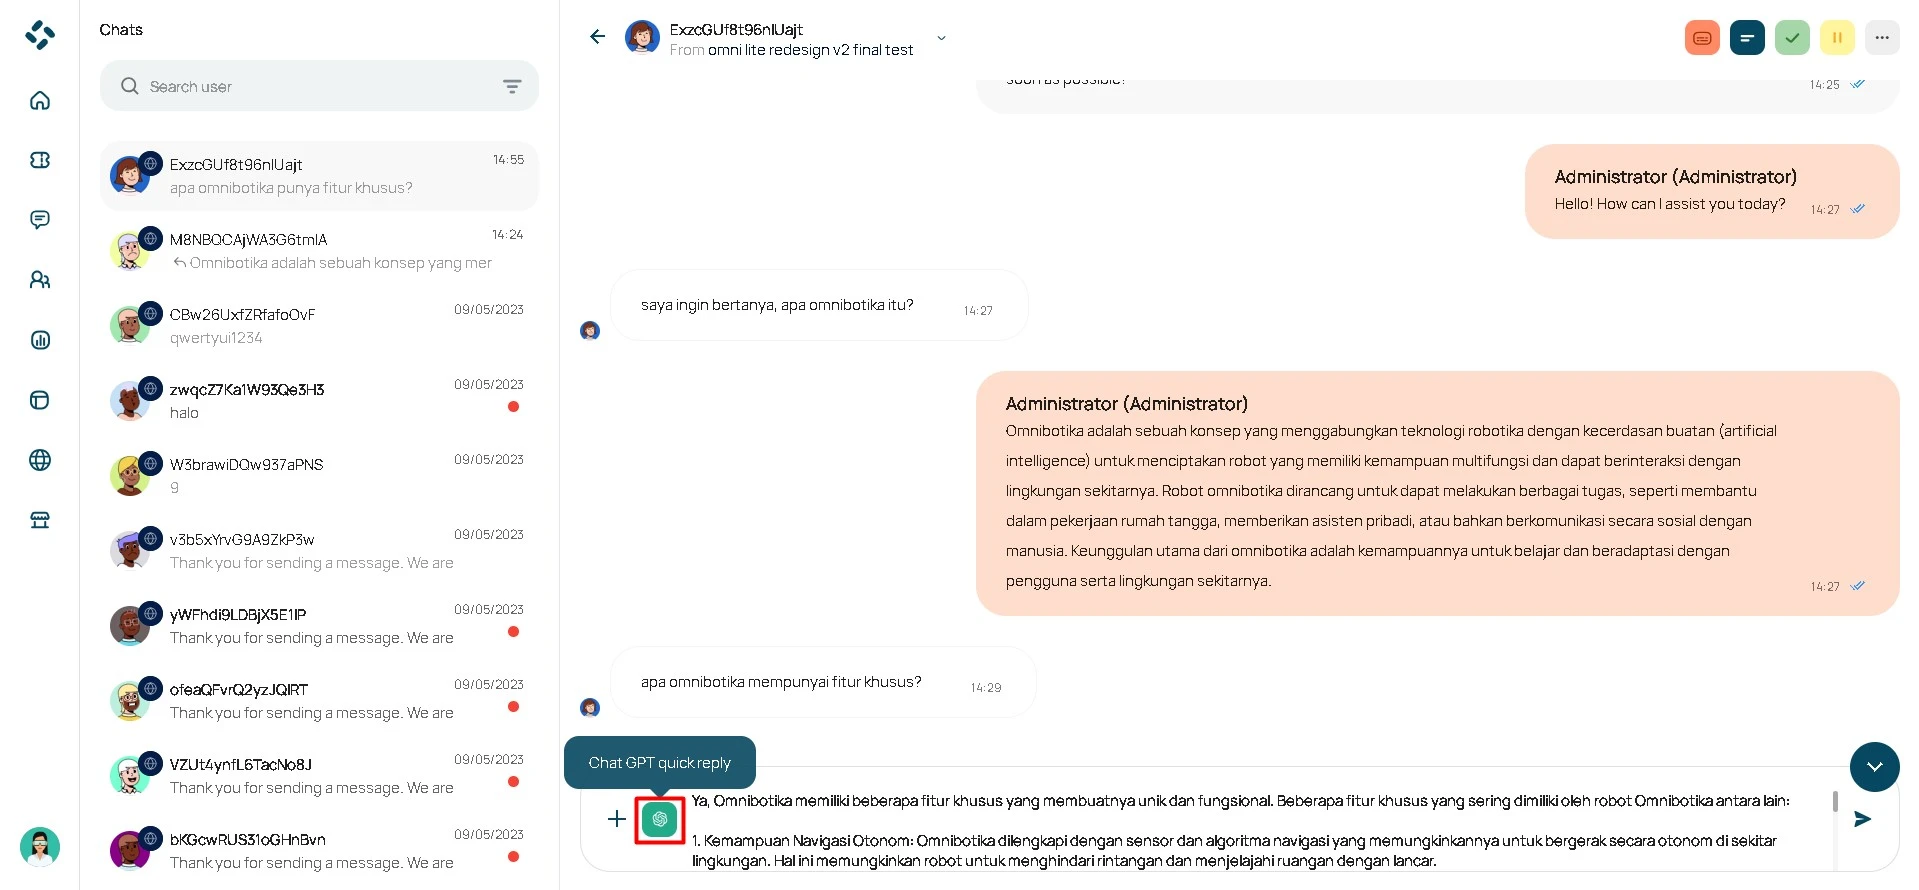
Auto Suggestion Reply
If you want to get auto suggestion reply, click on the chat GPT quick reply icon in the bottom left corner. You can regenerate other response variations by click the Chat GPT icon again.
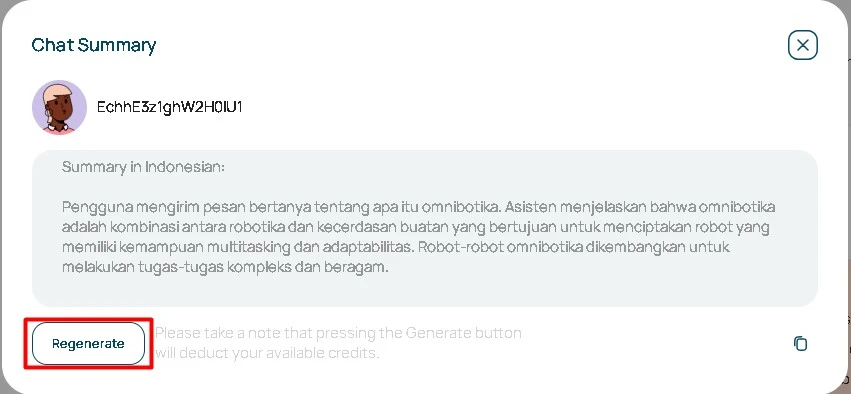
Chat Summary
Follow these steps to view the chat summary :
Select the message you want to reply to. Click the orange chat summary icon in the chat console navigation.

Click "Generate" to display the chat summary, and "Regenerate" for other response summary.