Omnibotika Help Center
Webhook Integration
To integrate Webhook into your Omnichannel dashboard, please follow these steps :
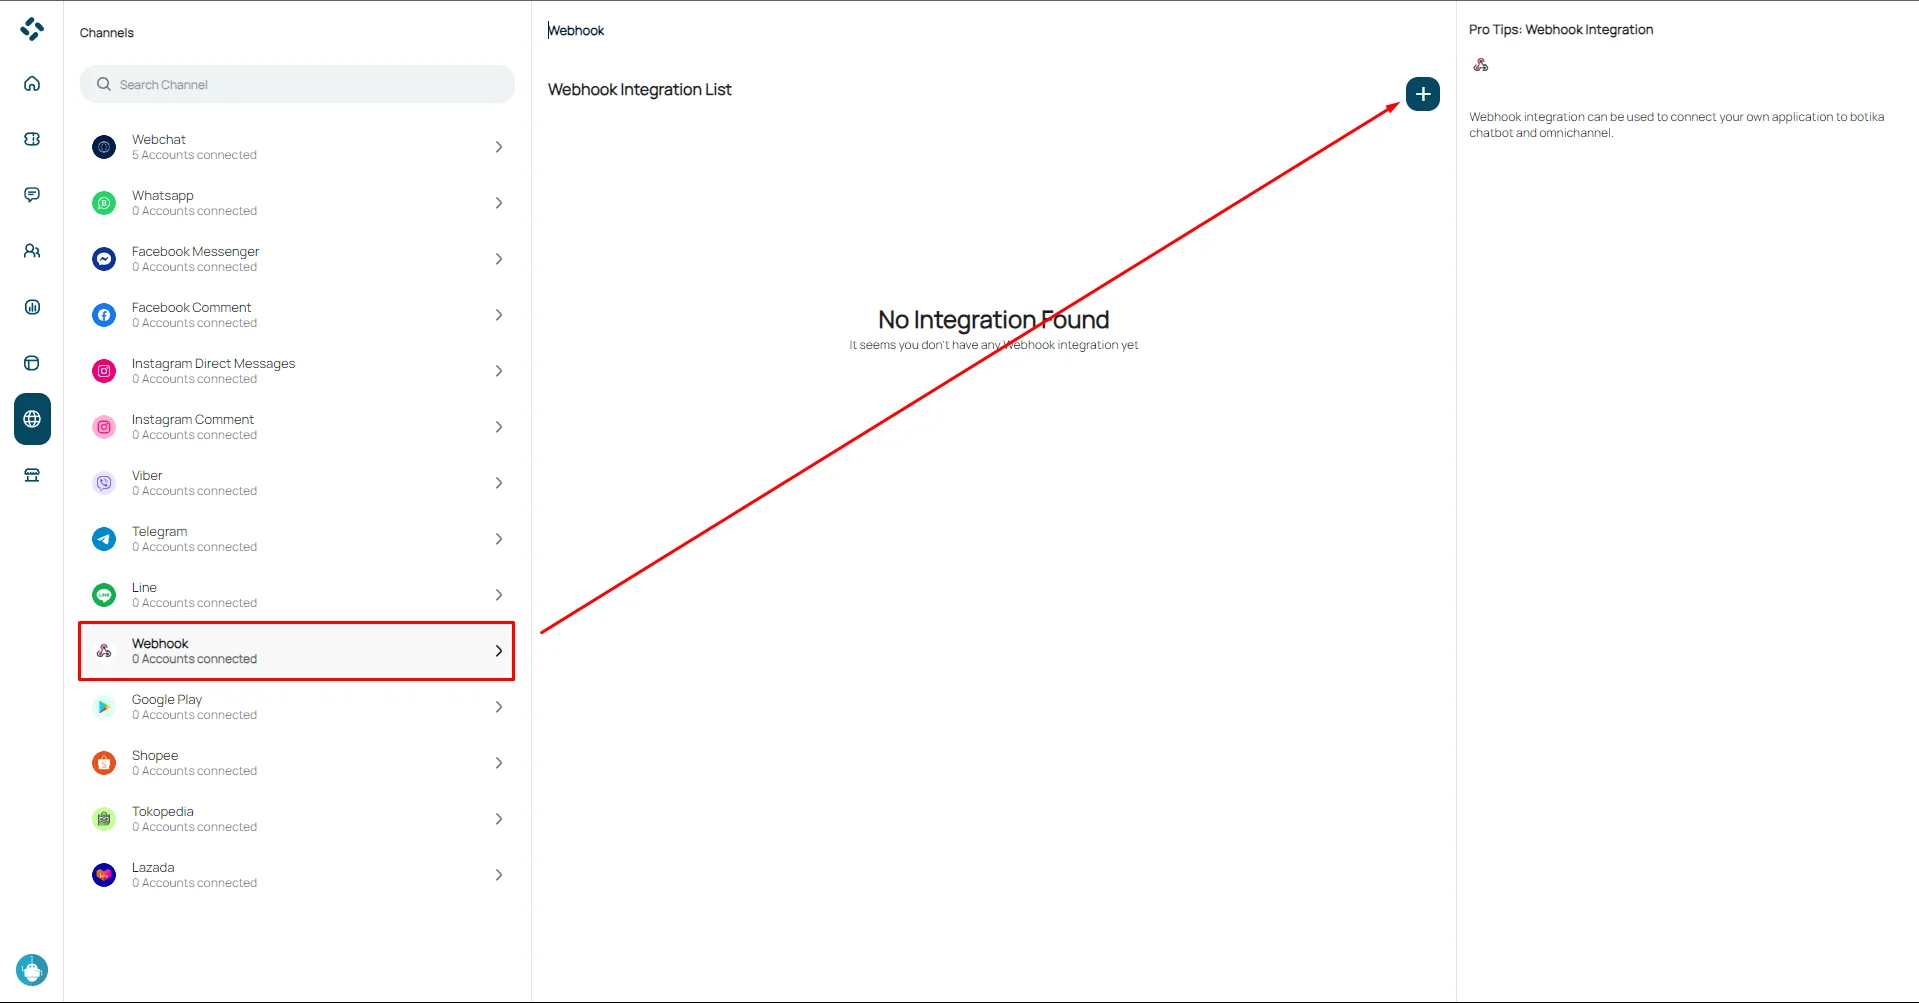
Open the Channel Menu in Omnibotika, then select webhook. Click the plus icon (+).
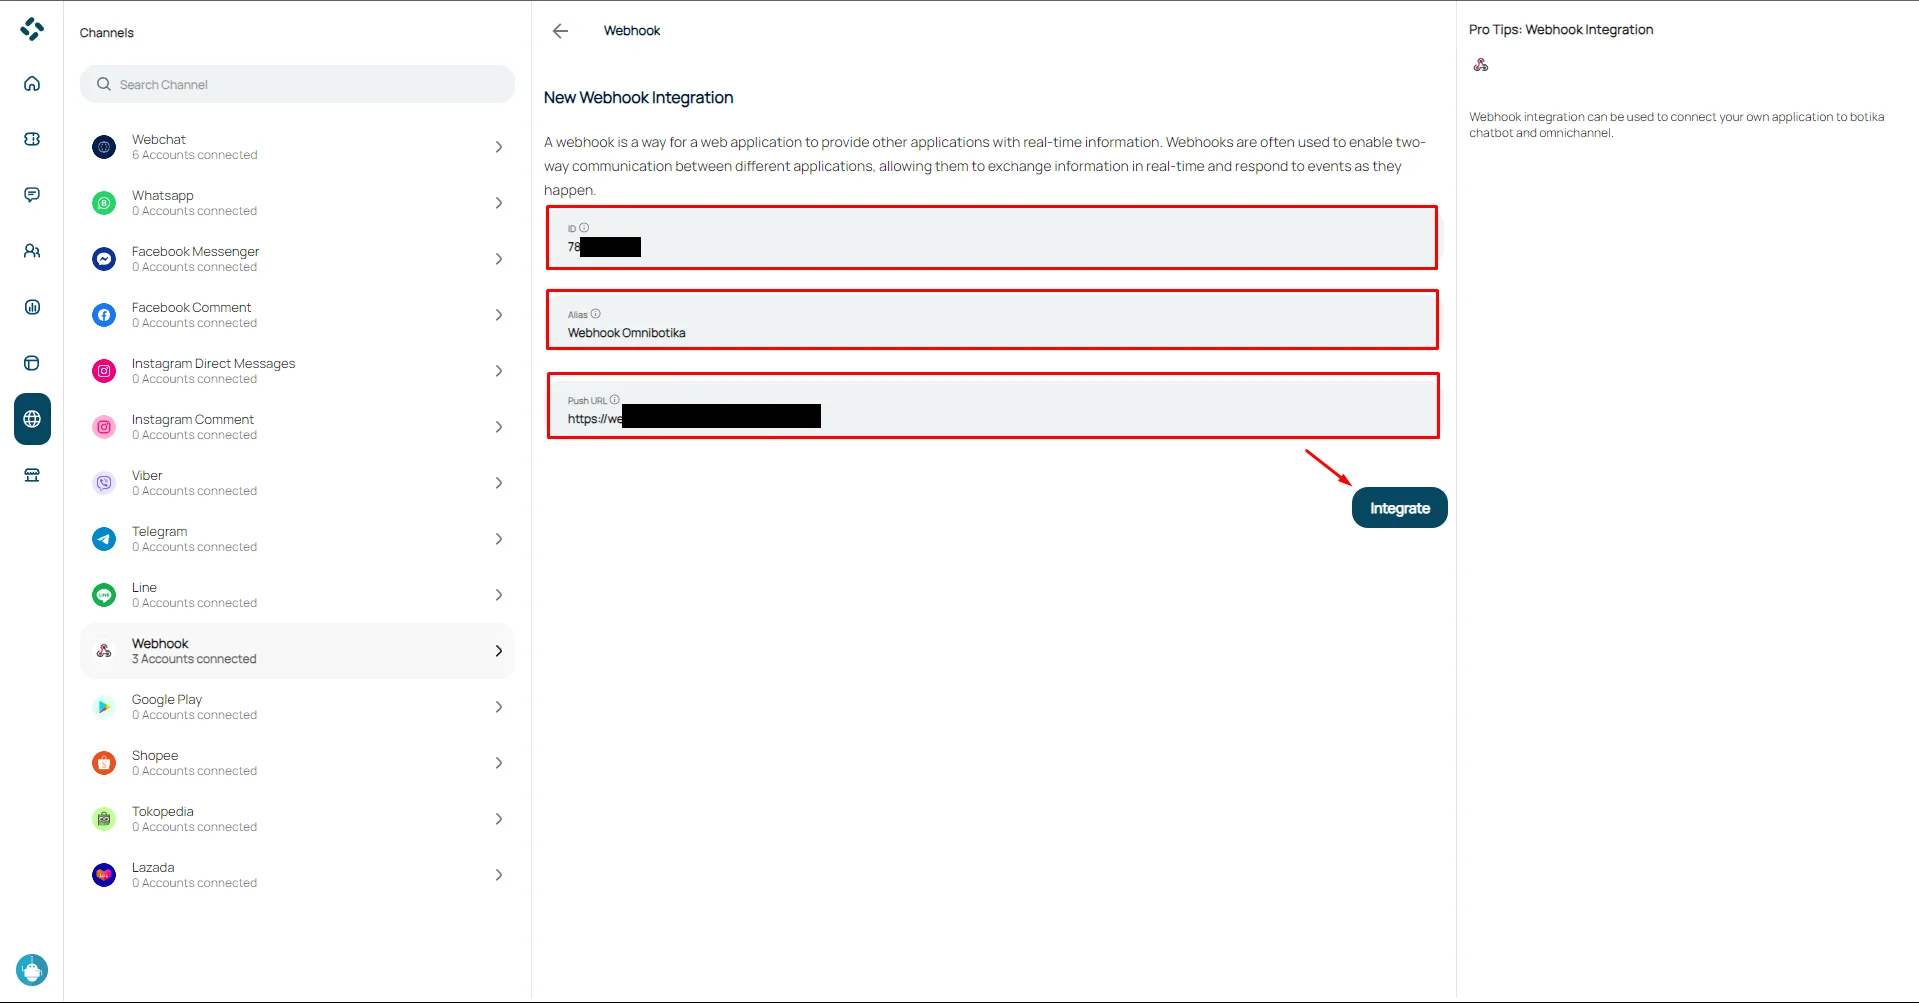
Fill in ID, Alias, and Push Url.
Note:
- Unique ID : Mobile Number, App ID, etc.
- Alias : Enter the name of the desired integration, for example Omnibotika Webhook.
- Push URL : Fill in the URL address that Botika can use to send push messages to your application.
After that, press the three-dot icon in the right corner of the Webhook Integration List. Then select the details menu.
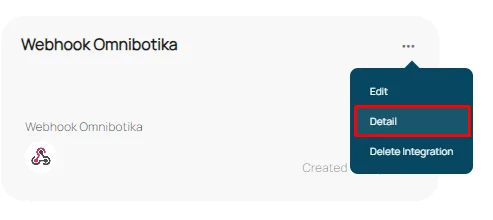
After that, you can copy the Botika Endpoint, Token Authorization, and Sample JSON Request for webhook testing.

Webhook Integration Test Using Postman:
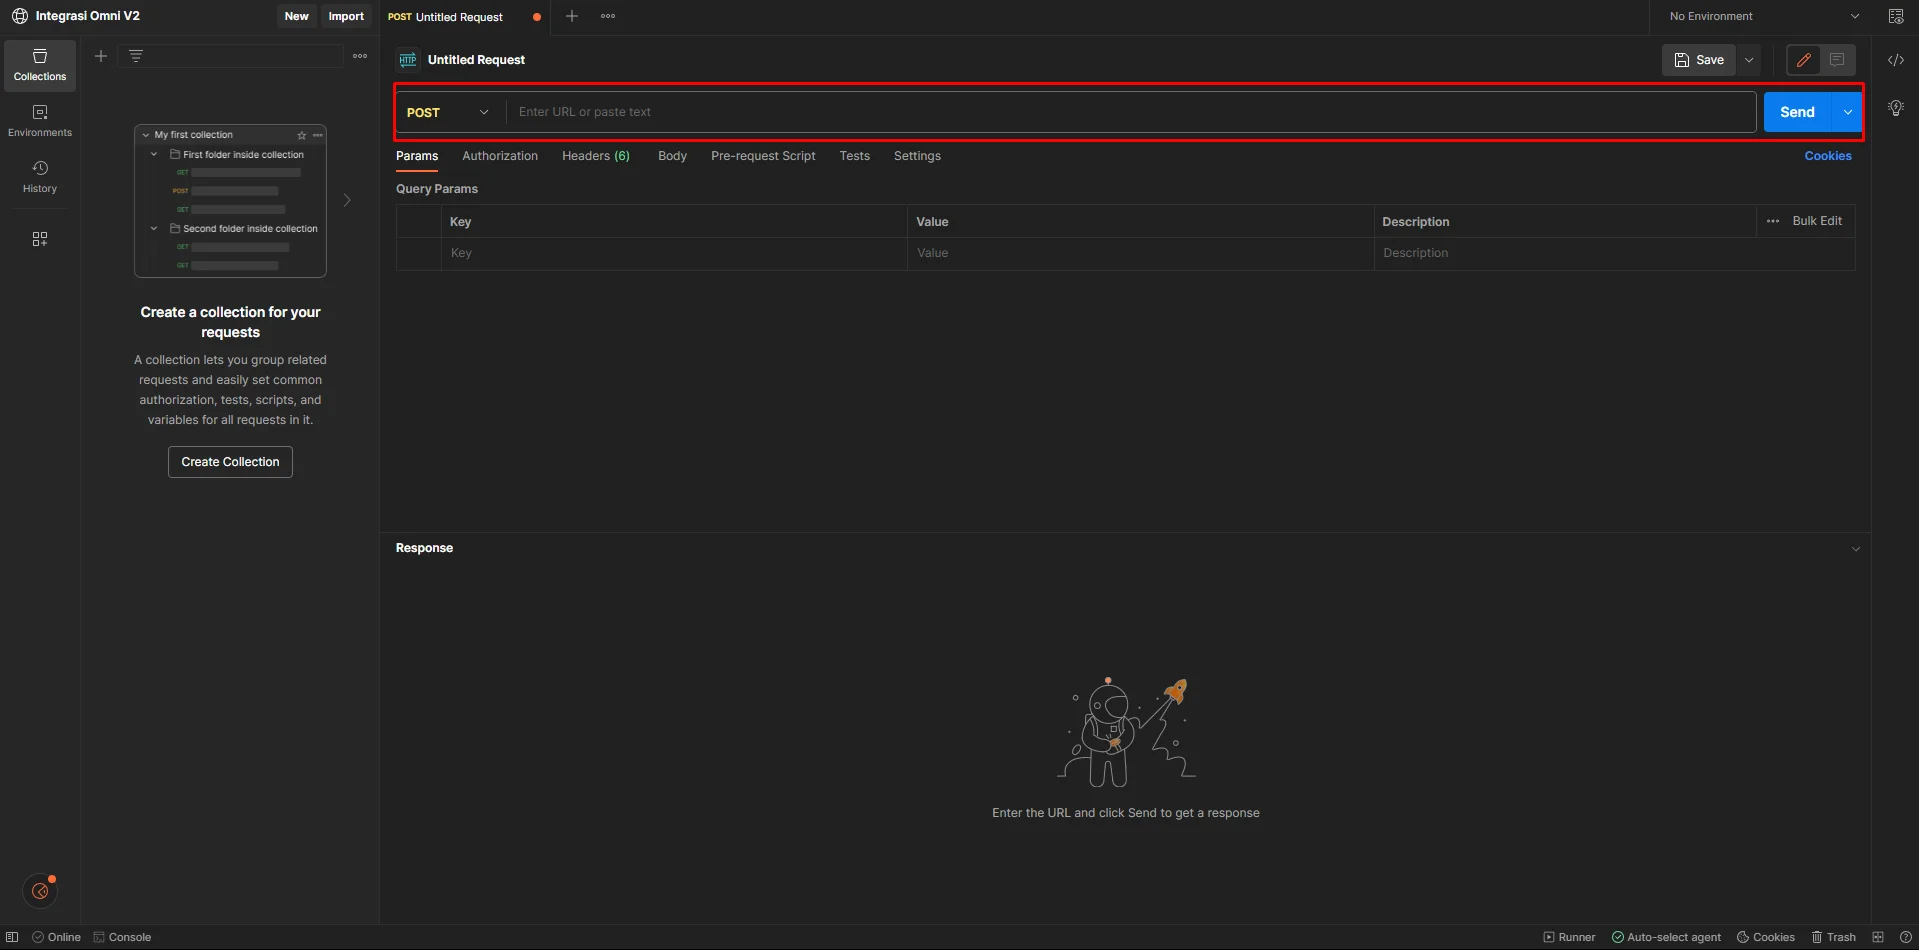
Visit the Postman Website in your browser.
In your Workspace, paste the URL that points to the Botika Online Webhook with the post method.
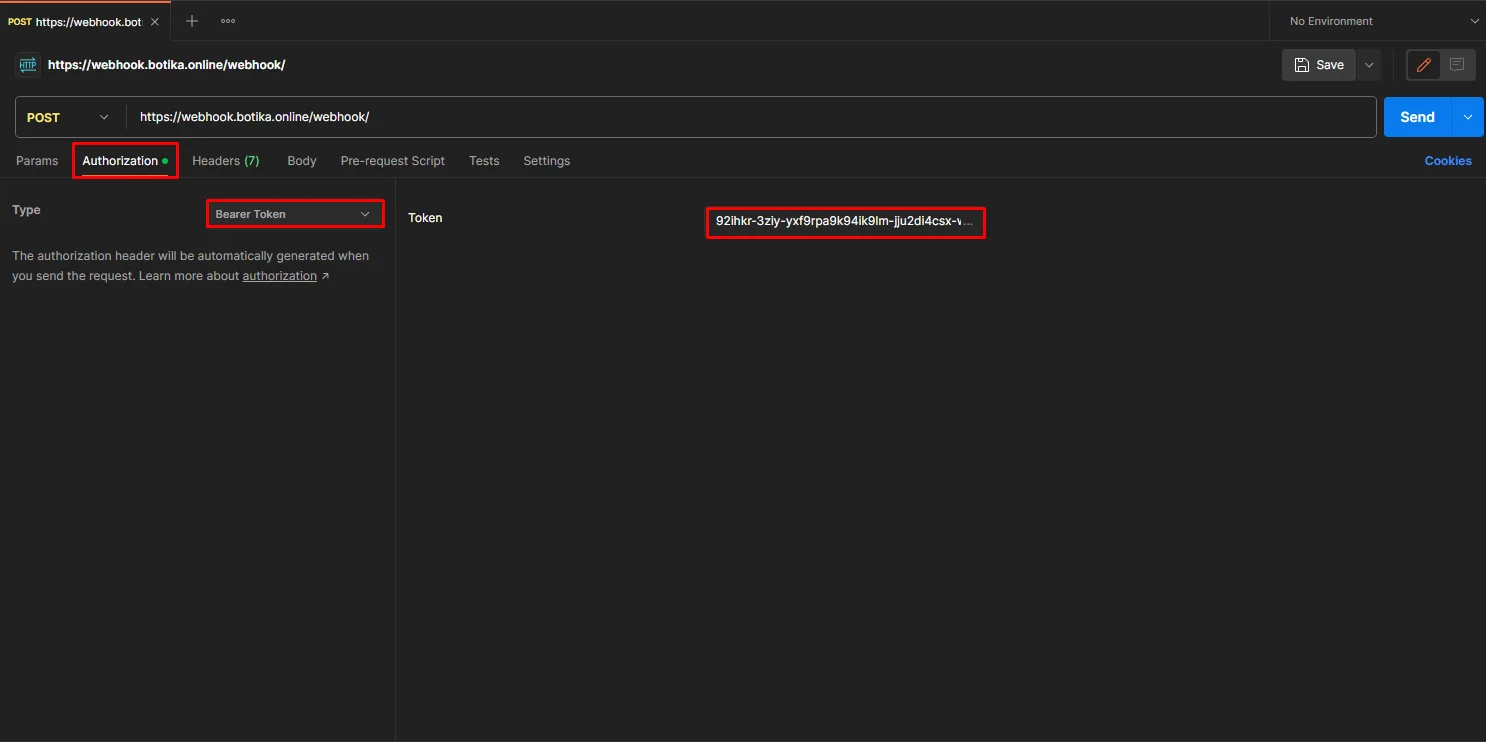
After that, select the Authorization tab, select the Bearer Token type. Copy the Authorization Token then paste the code.
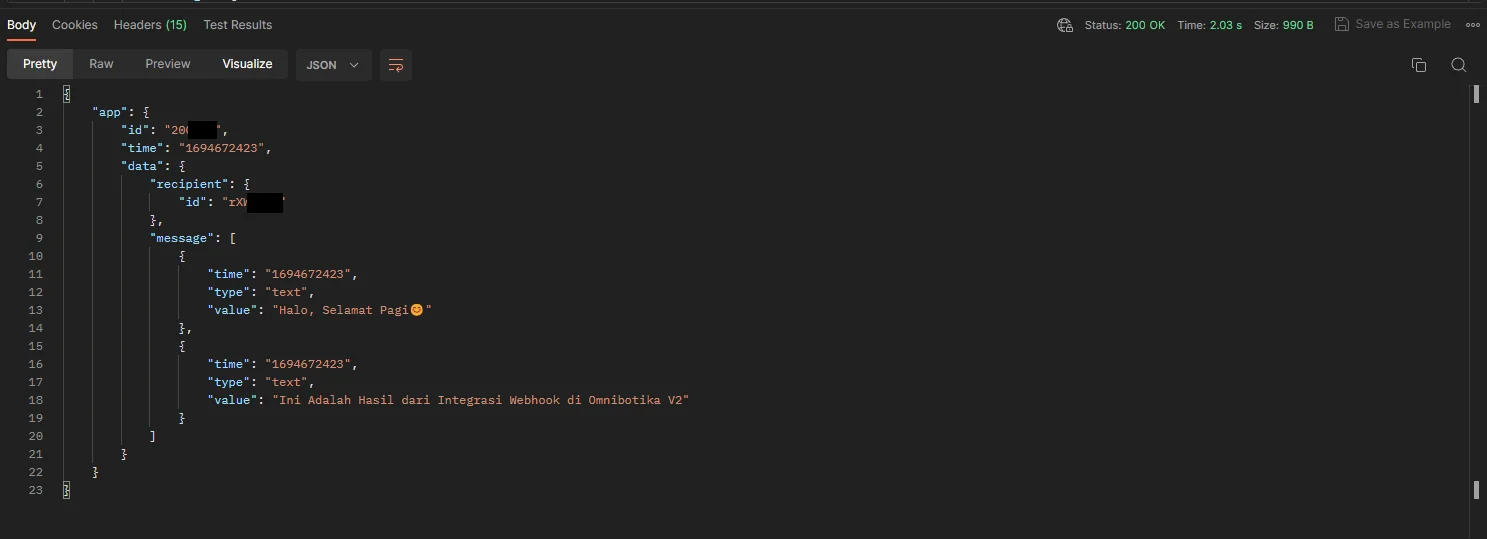
On the body tab, send a request in json form with a structure like in the example above. After that, click the "Send" button.
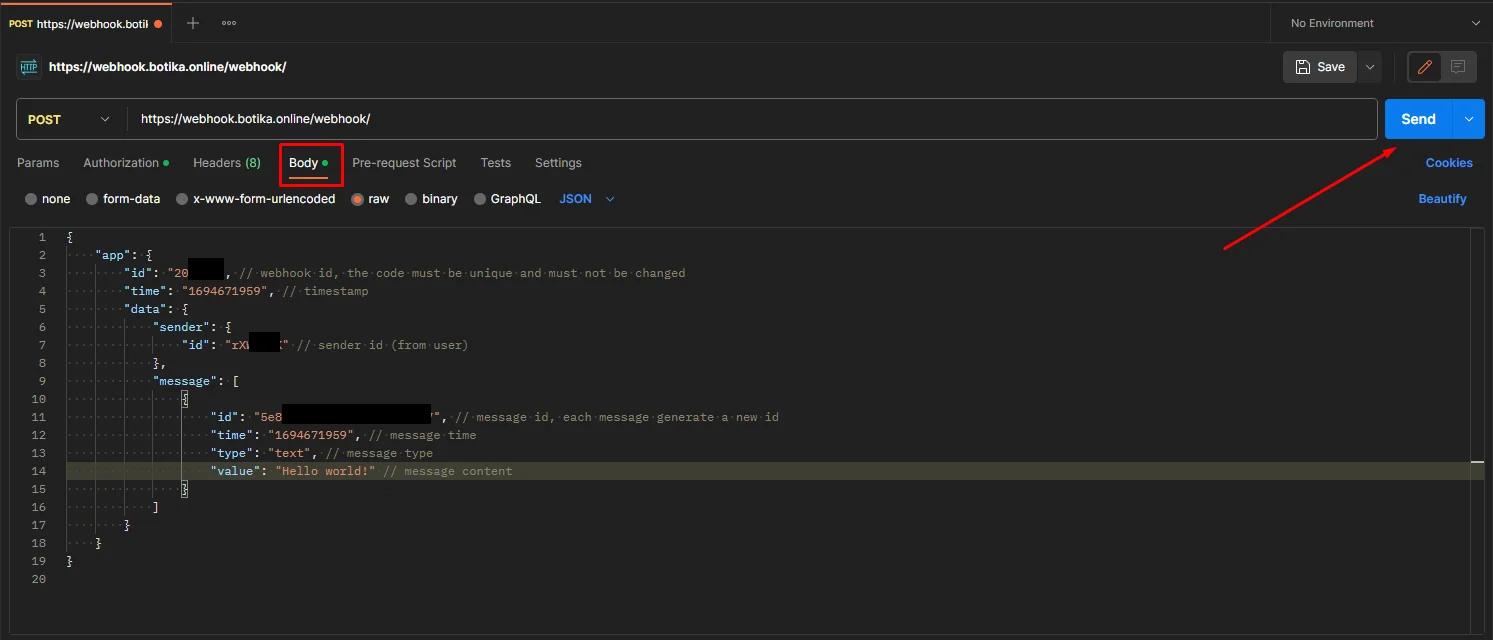
Below are the results of the JSON Response that has been sent.